Create a New Branching Form
This guide offers a comprehensive walkthrough for creating an inquiry form with consent using the Form Template Wizard. It simplifies the process by providing step-by-step instructions for setting up questions, including both open-ended and branching types. Users will learn how to customize responses, handle invalid answers, and validate their forms before activation.
Please note: This Mogli Form Template Wizard is available on Mogli v5.139.1 (Mount Elbert) and above. You can find the older method of creating Branching Form Templates via records here.
Step-by-Step Guide to Create a New Branching Form
1. In the Form Template Wizard app, navigate to the Form Template Wizard tab.
2. Select Create New Form.
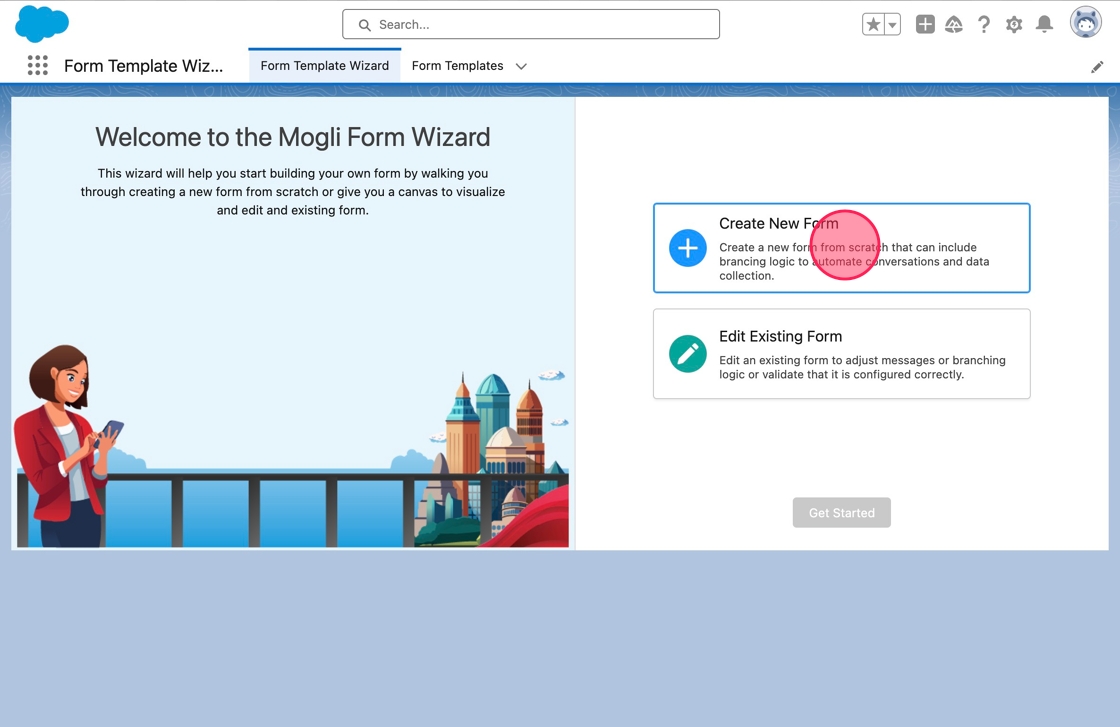
3. Click Get Started to start creating the new form template.

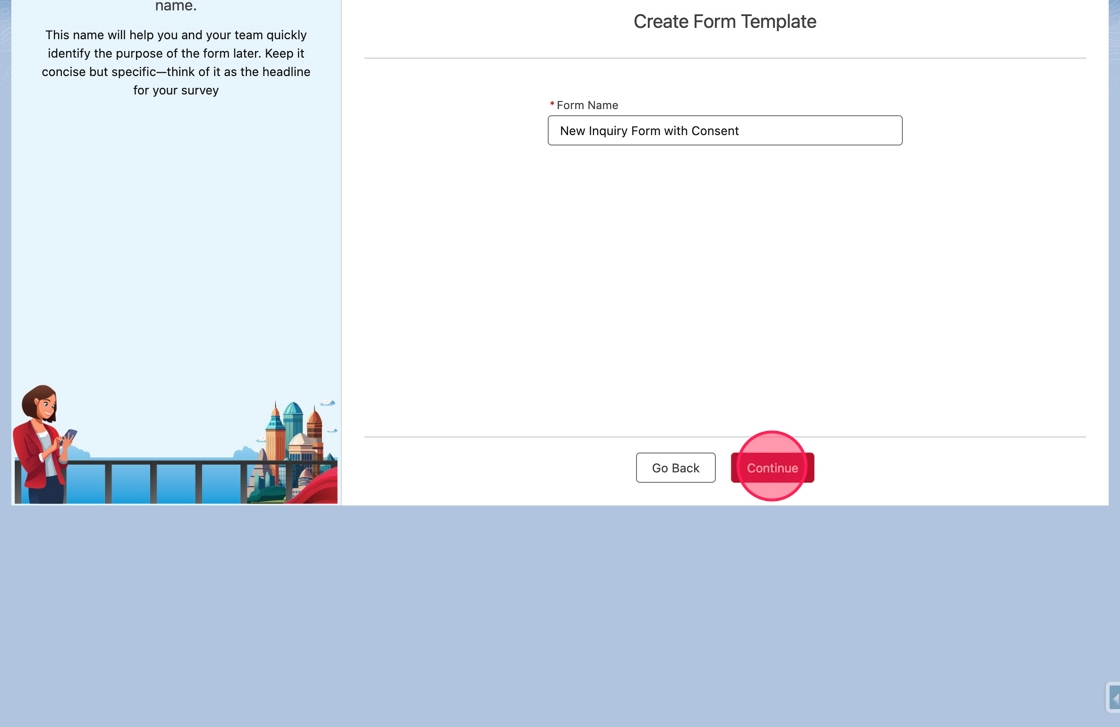
4. The first step will be to give the form a name. Click or tab into the Form Name field. Type New Inquiry Form with Consent in the field.
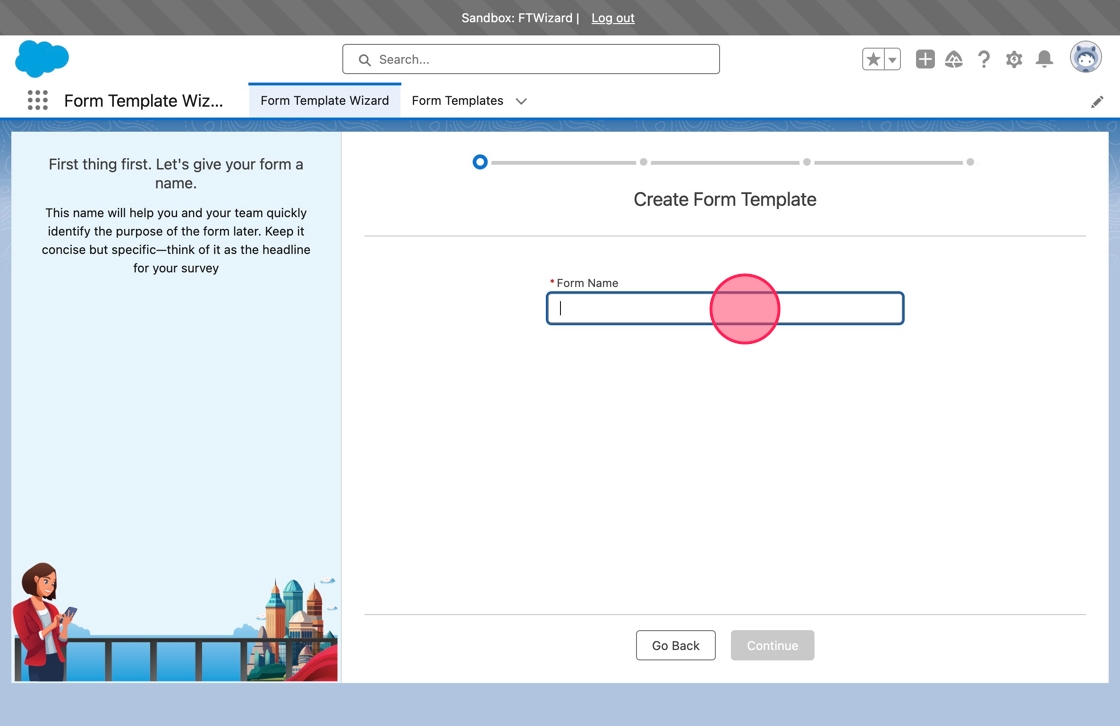
5. Click Continue to move to the next step.
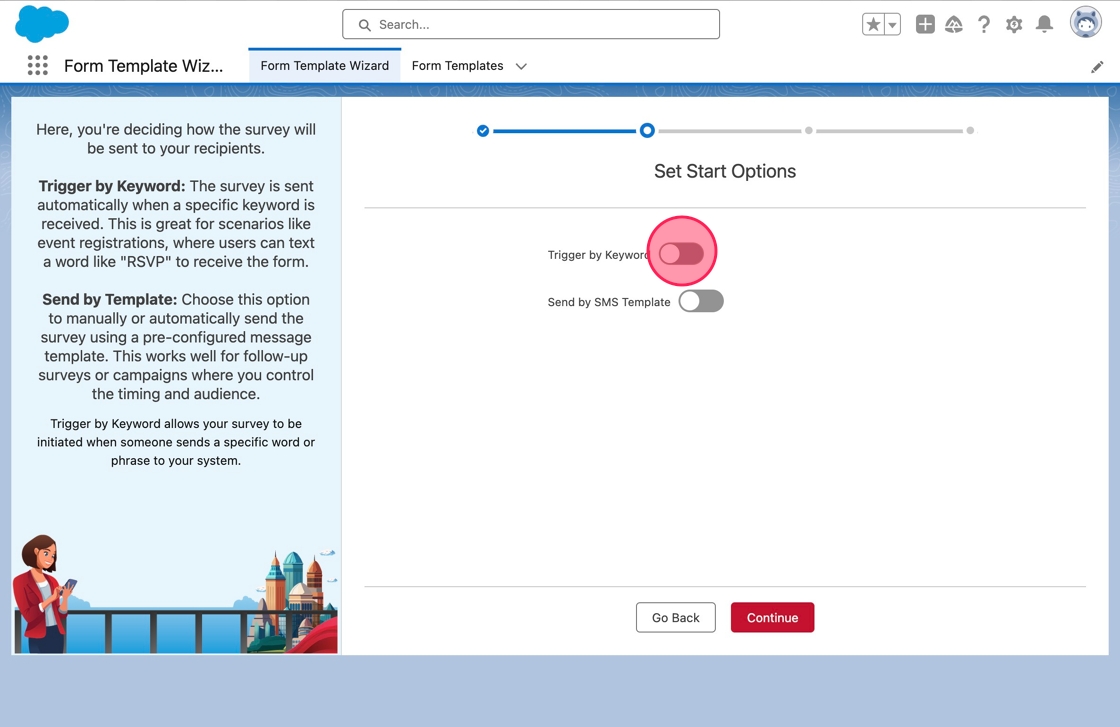
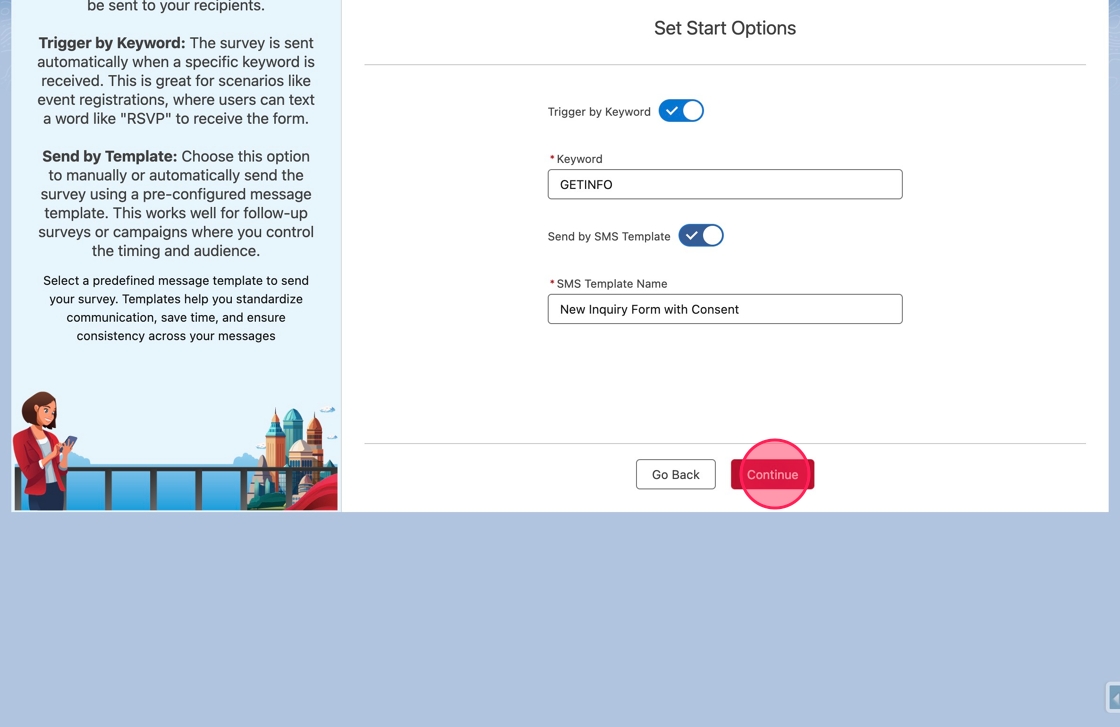
6. The next step is to set start options for the form. The start options are to trigger the form in response to an incoming keyword or to generate an SMS Template to allow users to send the form manually.
Click the toggle next to Trigger By Keyword to toggle the field to input the keyword.
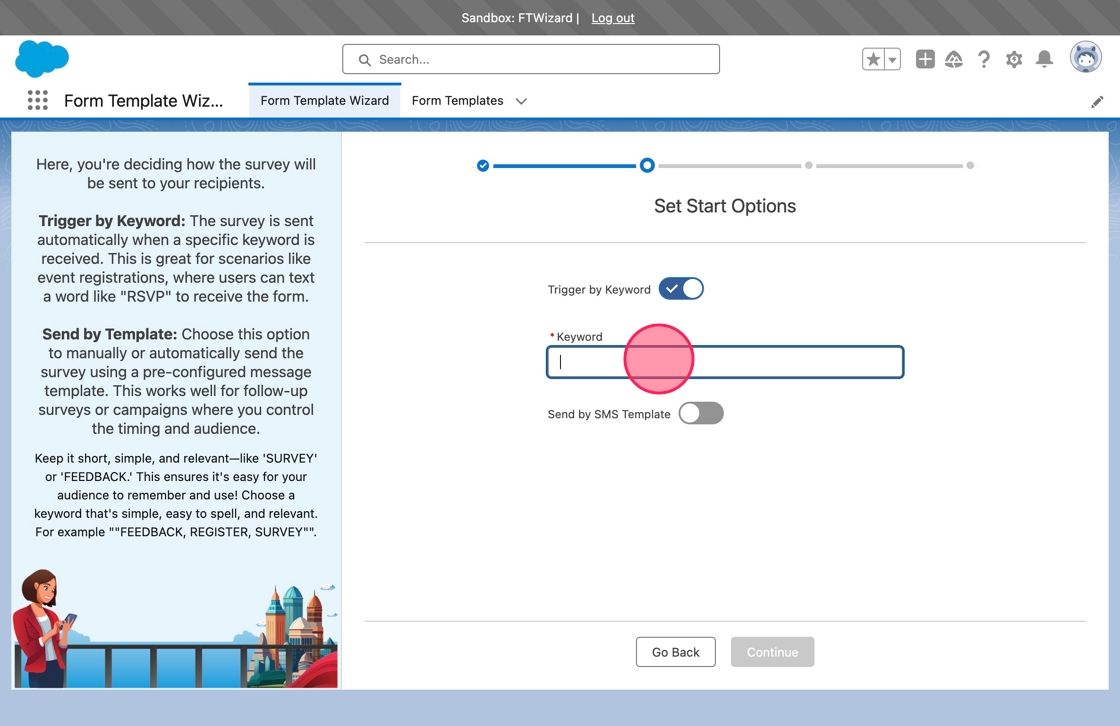
7. Click or tab into the Keyword field. Type GETINFO in the field.
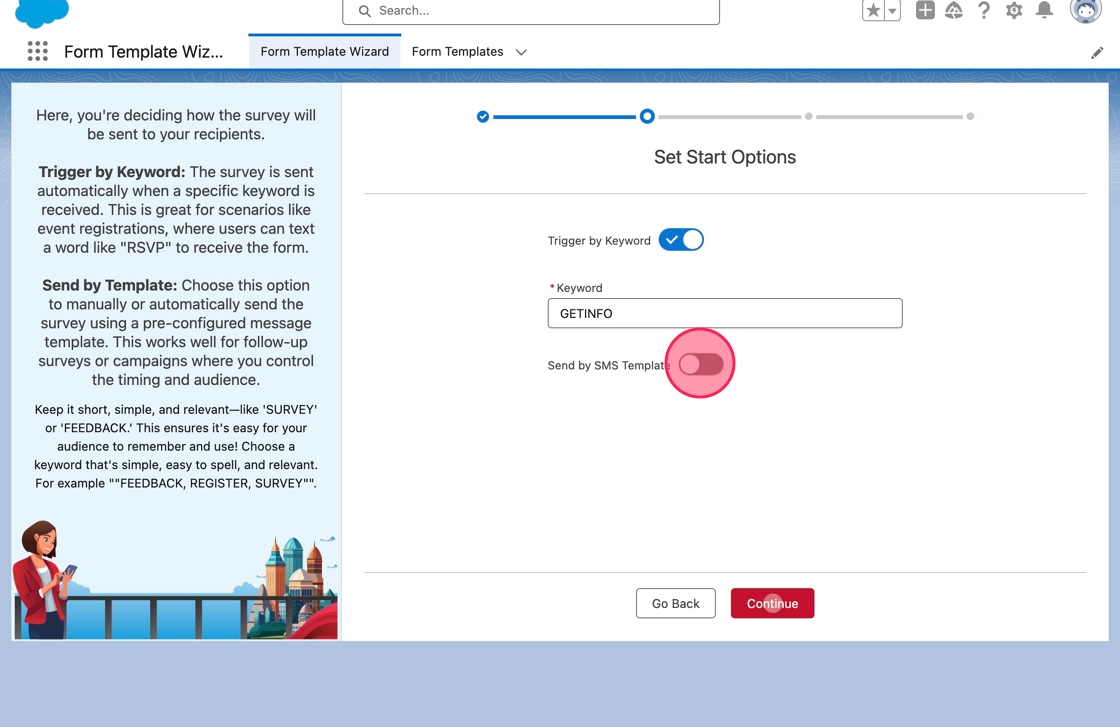
8. Click the toggle next to Send by SMS Template to create an SMS Template that allows users to send the form manually.
9. The SMS Template Name field will default to the name of the form.
The name can be changed if desired, and it will validate that an SMS Template does not already exist with the same name.
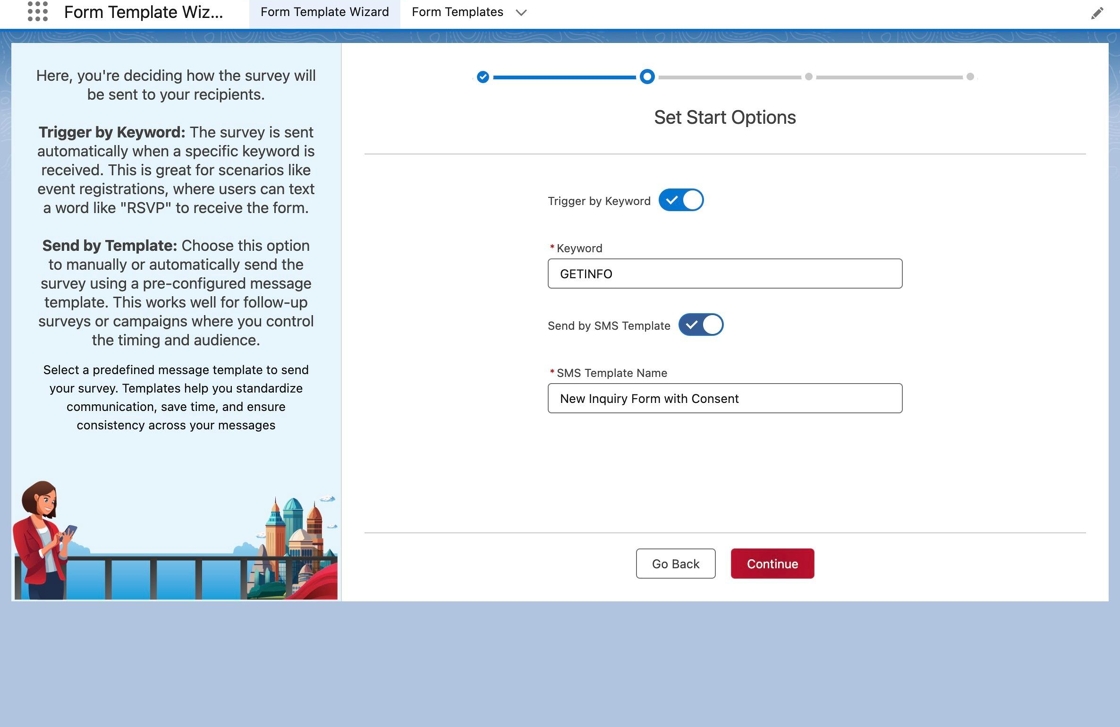
Alert: The SMS Template will be created only after the form has been activated.
10. Click Continue to go to the next step.
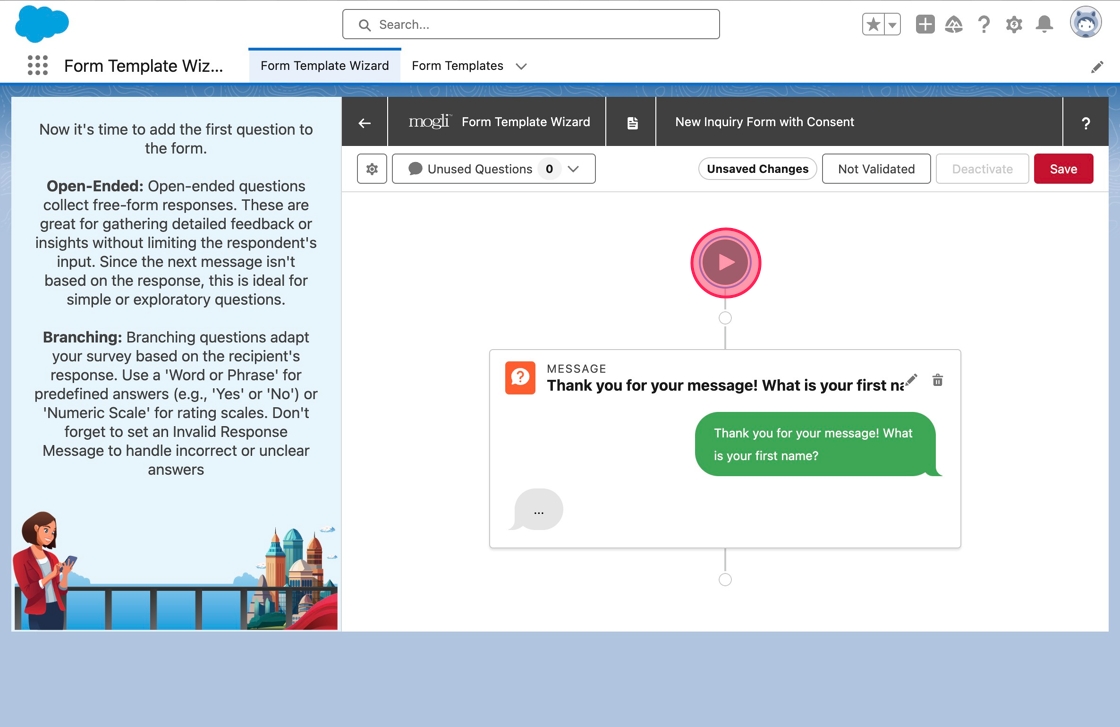
11. Now it is time to create the first question. Questions can be Open-Ended or Branching.
Open-Ended questions accept any response and proceed to the next question of the form or complete it.
Branching questions accept a predefined set of responses and proceed accordingly. These are used to add logic to the form.
Leave the Question Type on Open-Ended.
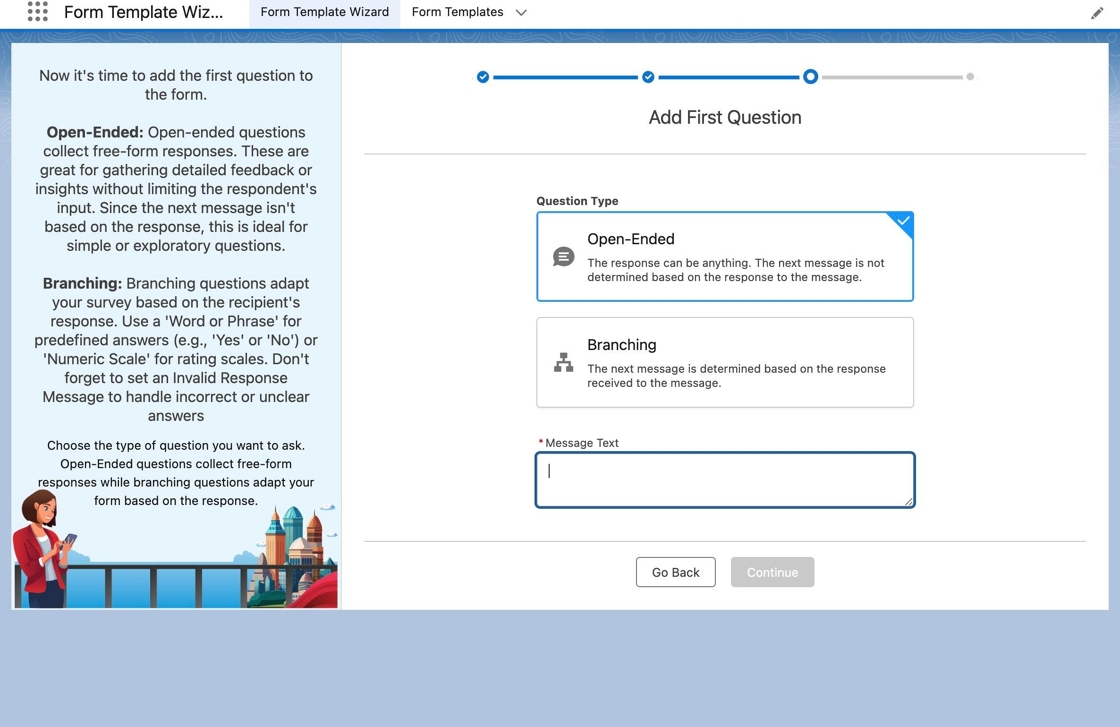
12. Click or tab into the Message Text field. Type Thank you for your message! What is your first name? in the field.
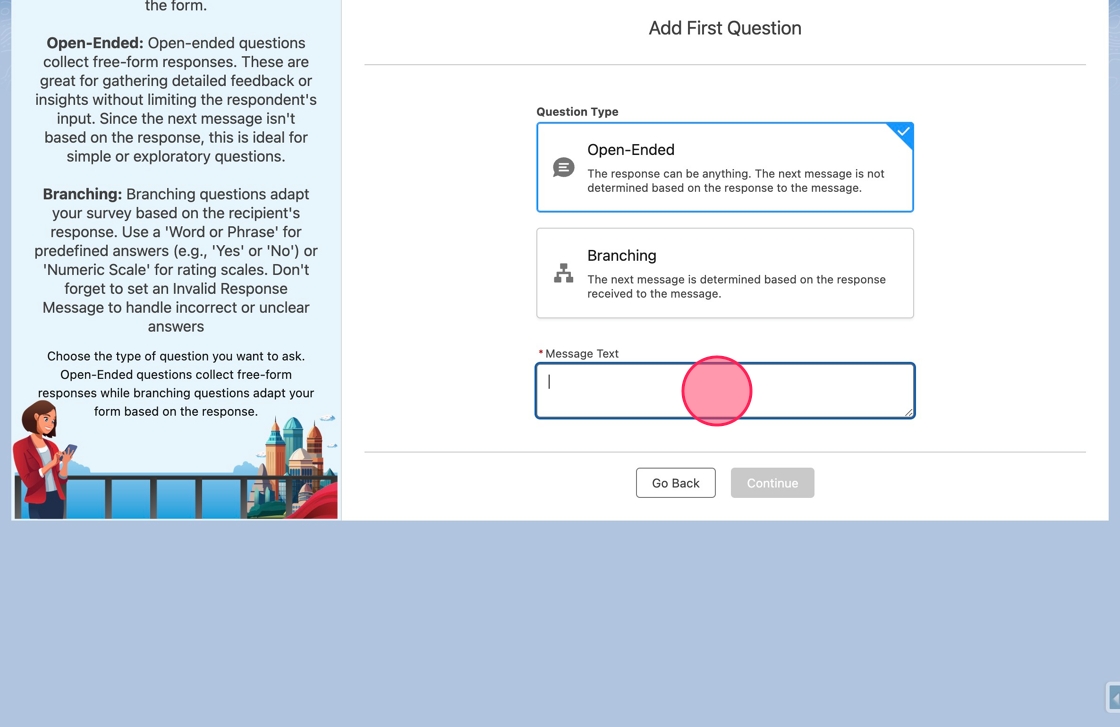
13. Click Continue to move to the next step.

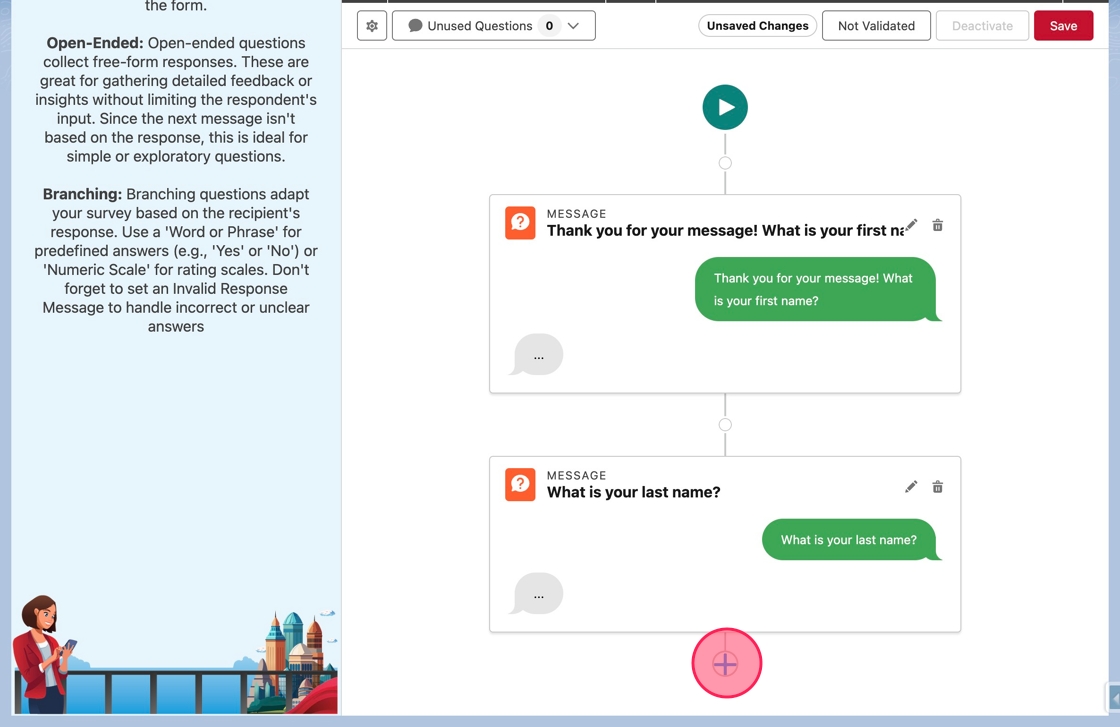
14. After creating the first question, the wizard will navigate to the canvas to finish building the form. The canvas gives a linear view of how the conversation will proceed.
In the canvas, the form can be edited and questions and branches can be added, edited or removed.
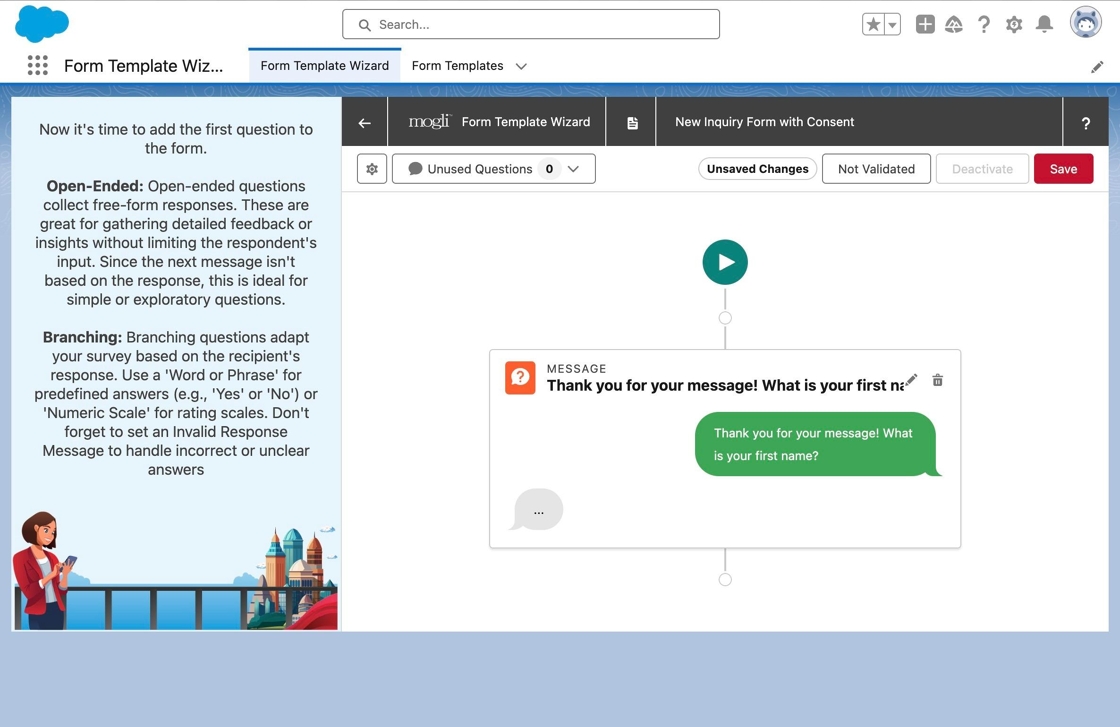
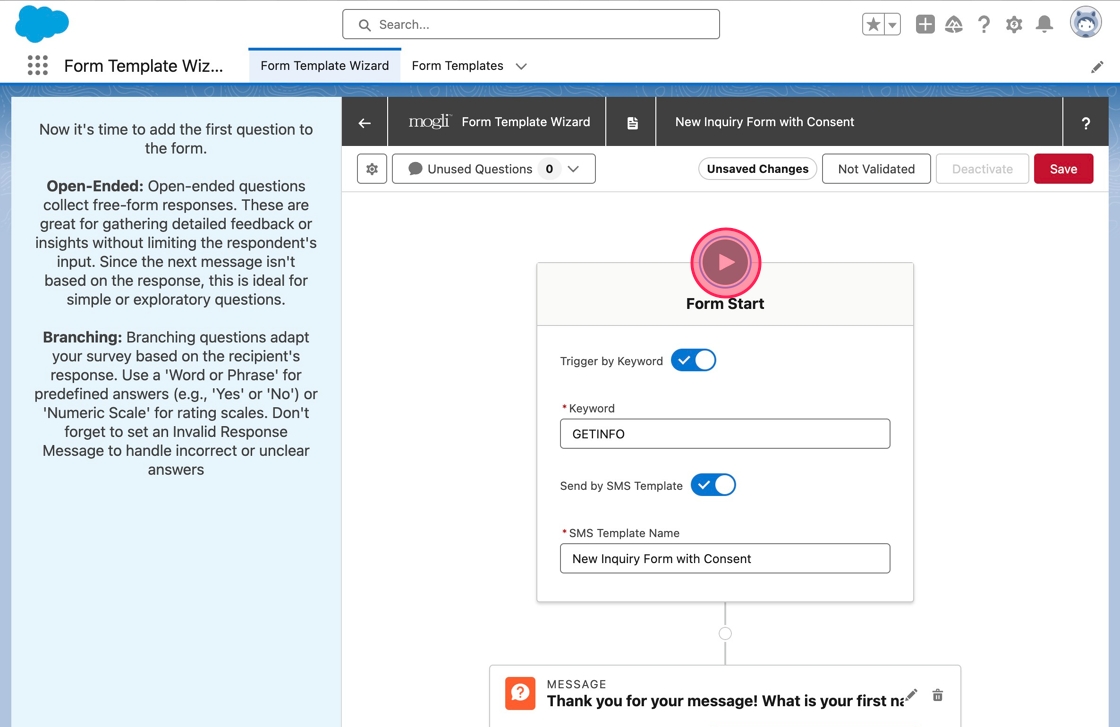
15. From the canvas, start options set previously can be updated. Click the Start node.
16. The Form Start menu will appear and here the Keyword and SMS Template settings can be updated. Click the Start node again to close the menu.
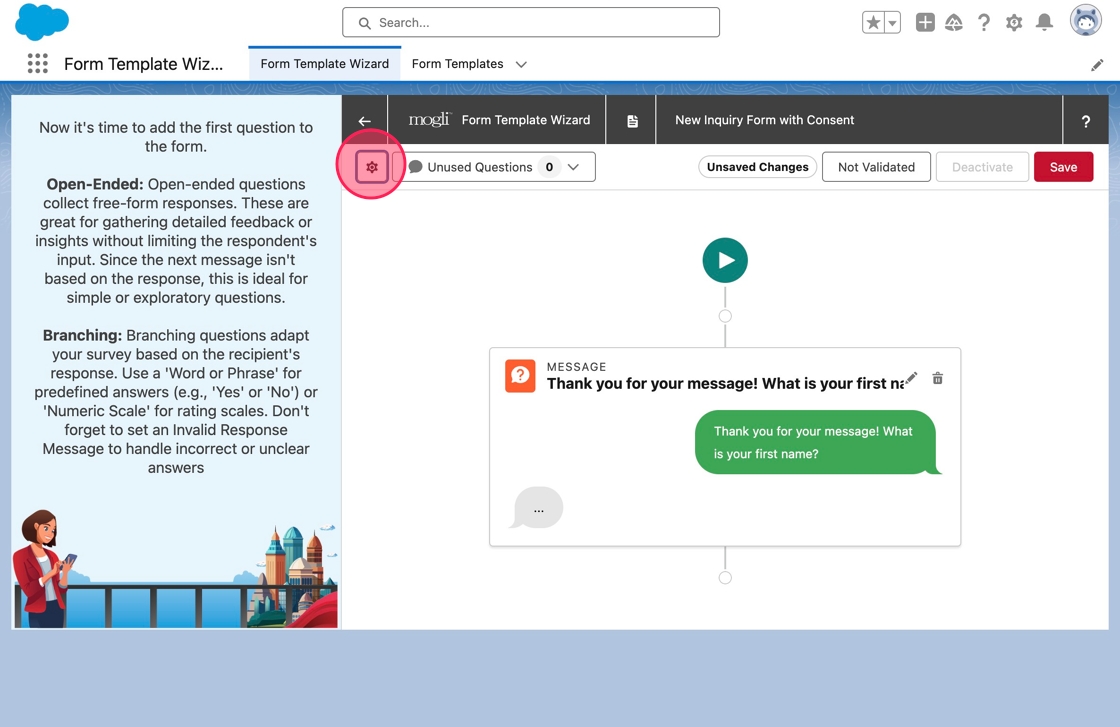
17. Other properties of the Form Template, such as the Name, can also be updated from the canvas. Click the gear icon in the top left of the canvas toolbar.
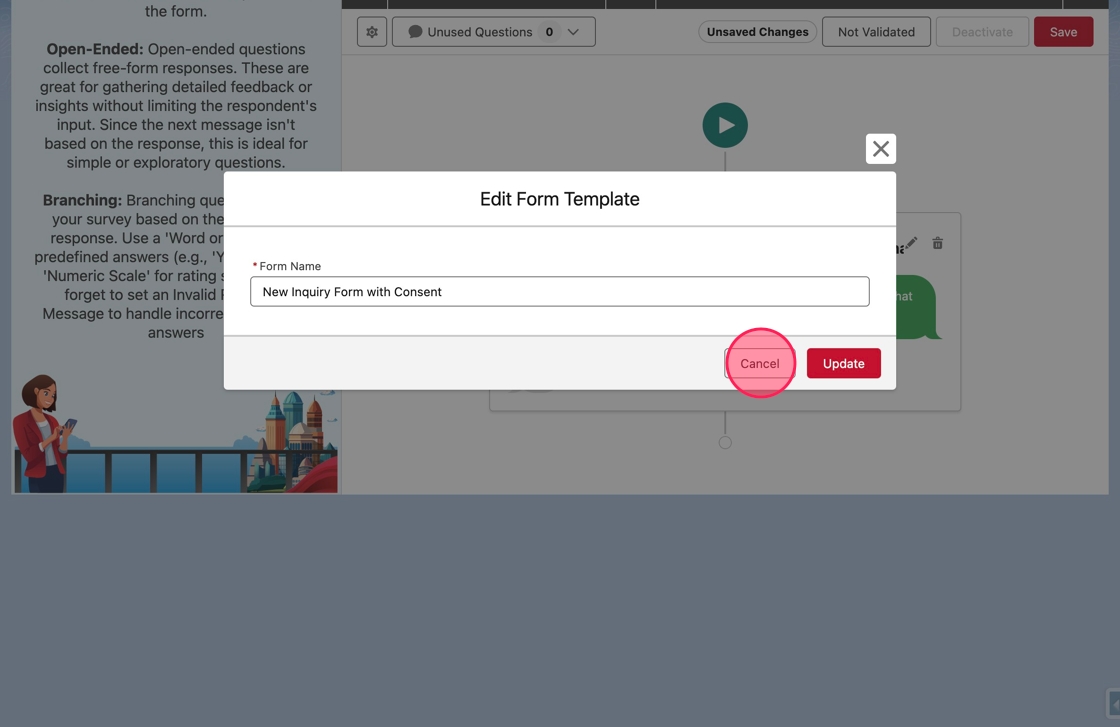
18. A modal will appear that enables updating properties of the Form Template. Click Cancel to close the modal without making any changes.
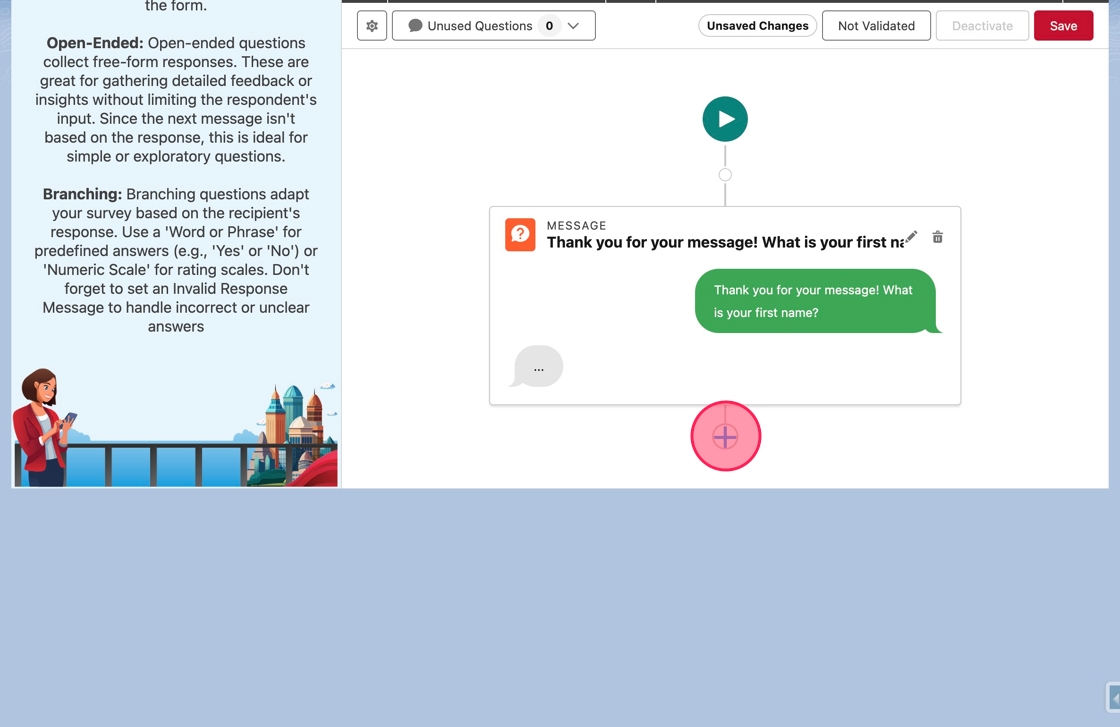
19. Back on the canvas, add a second question to the form. Click on the Add Question node below the existing question.
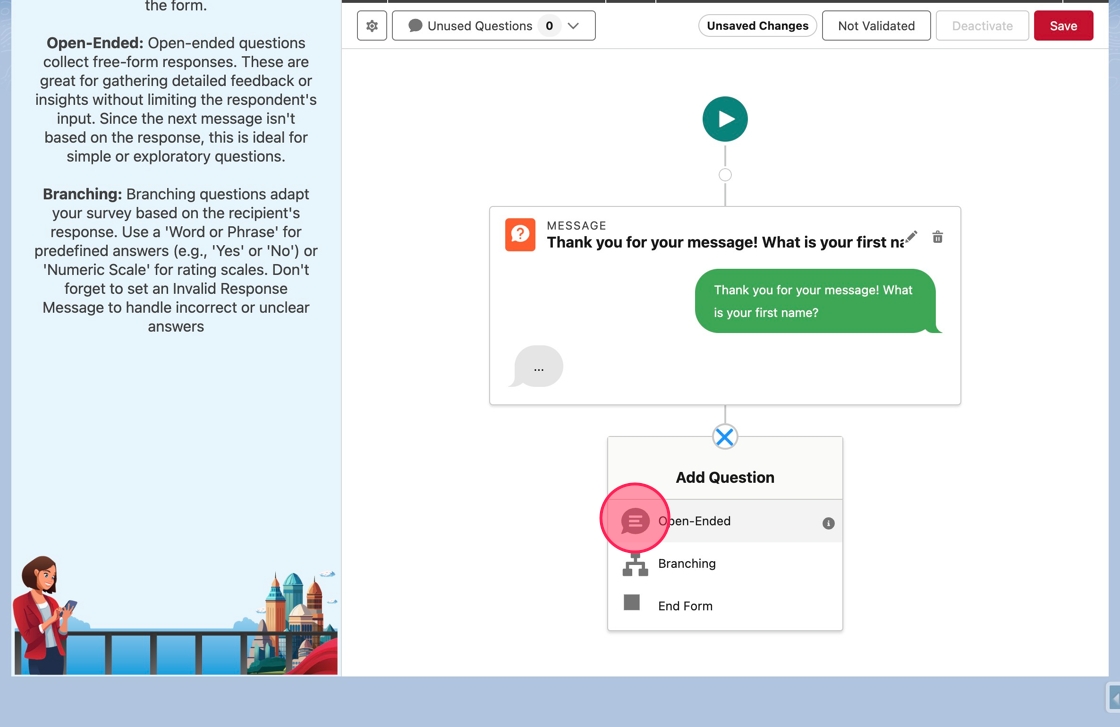
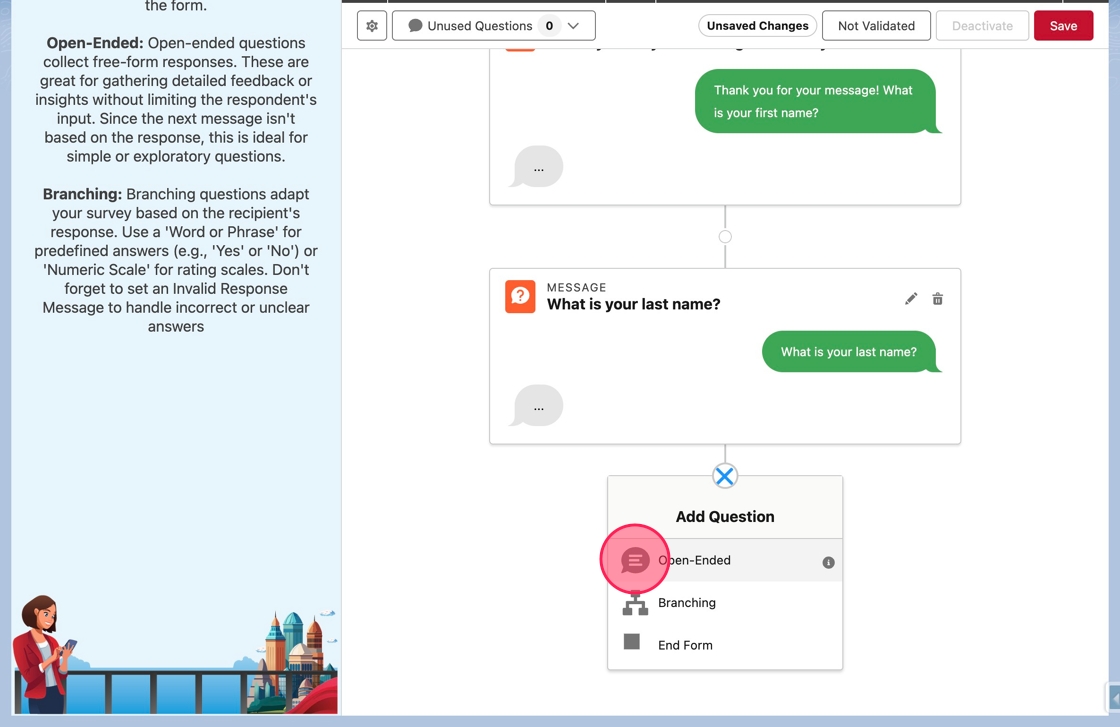
20. The Add Question menu will appear. Click Open-Ended to add a new Open-Ended question.
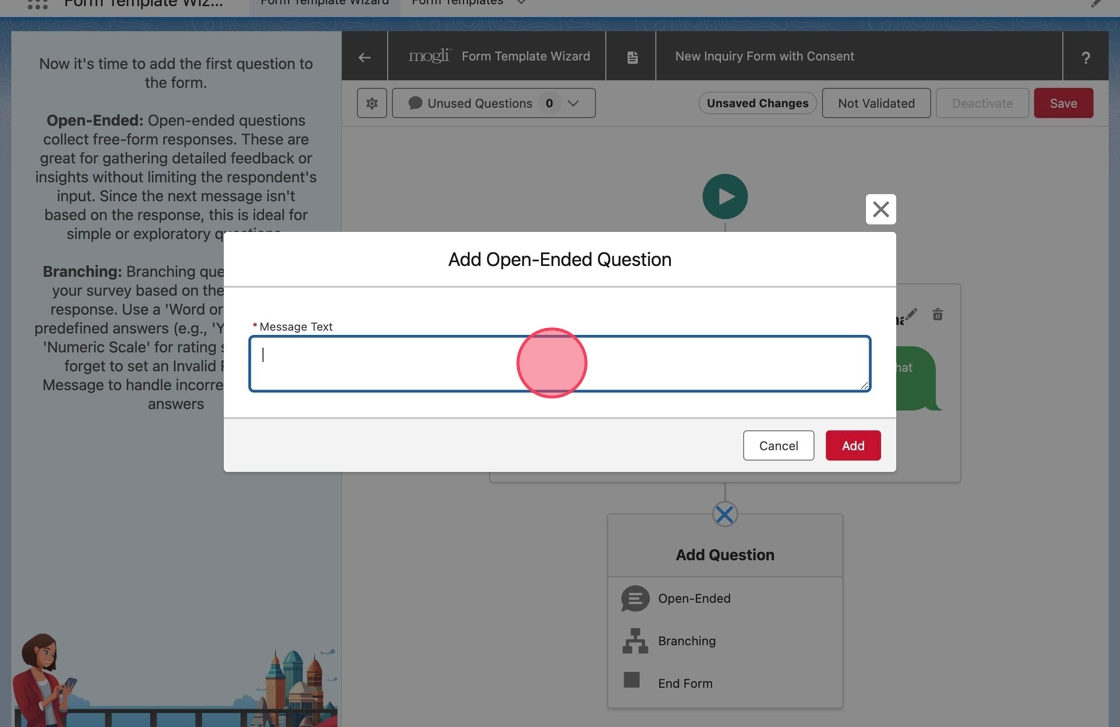
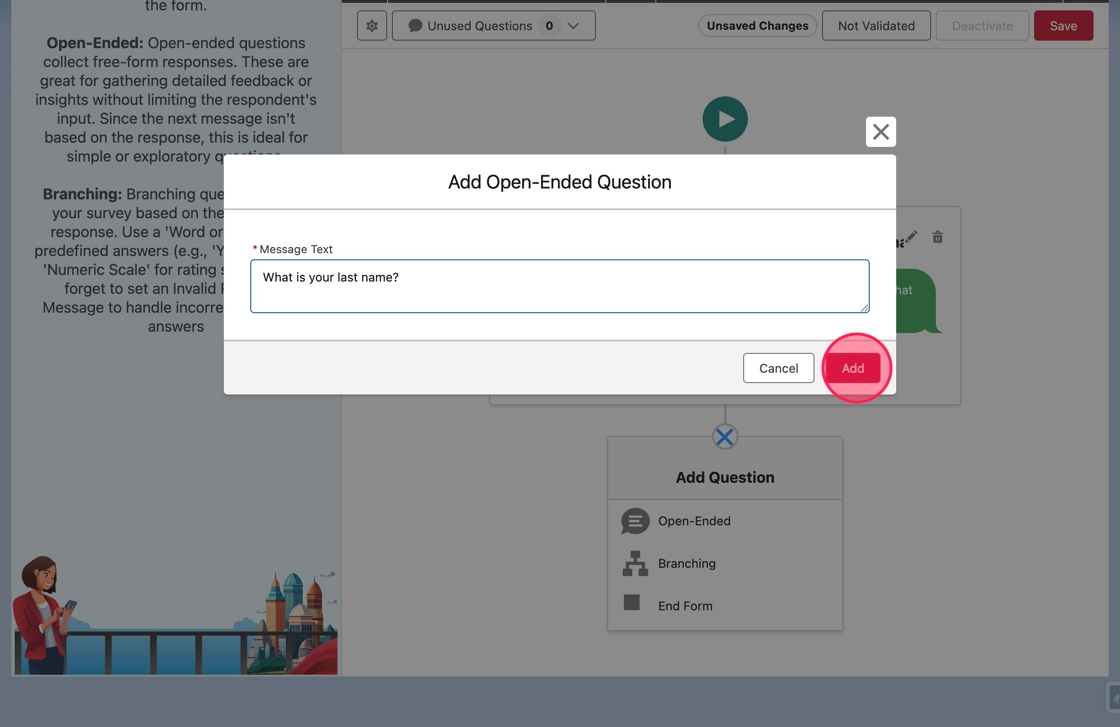
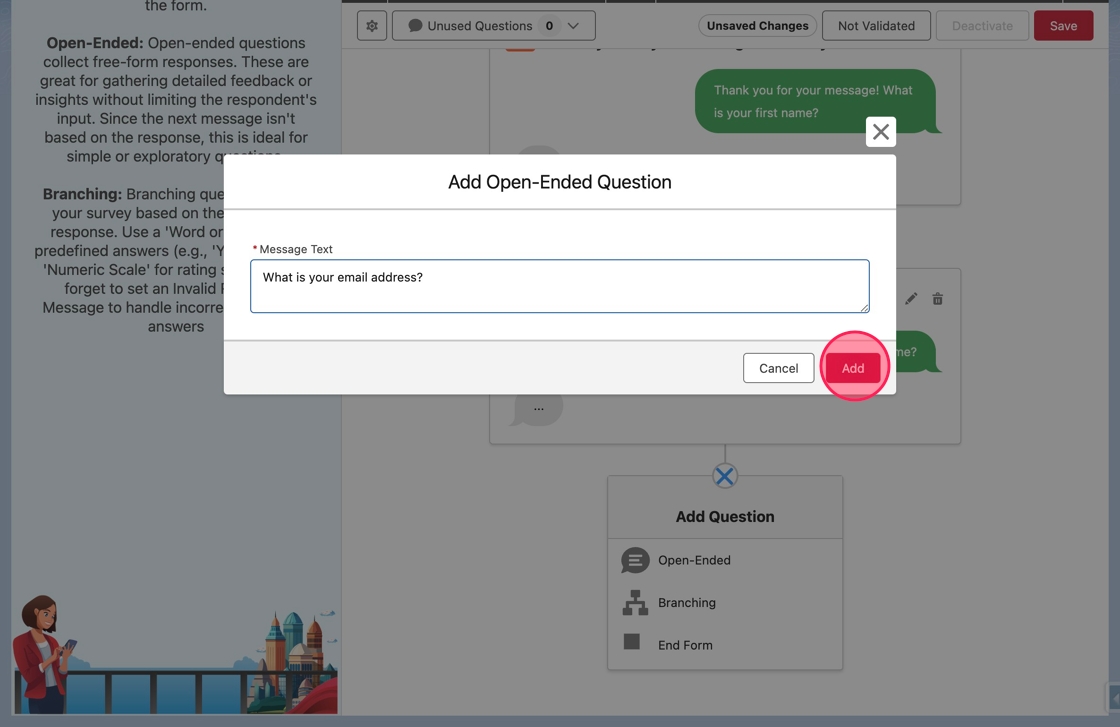
21. The Add Open-Ended Question modal will appear. Click or tab into the Message Text field. Type What is your last name? in the field.
22. Click Add to add the question.
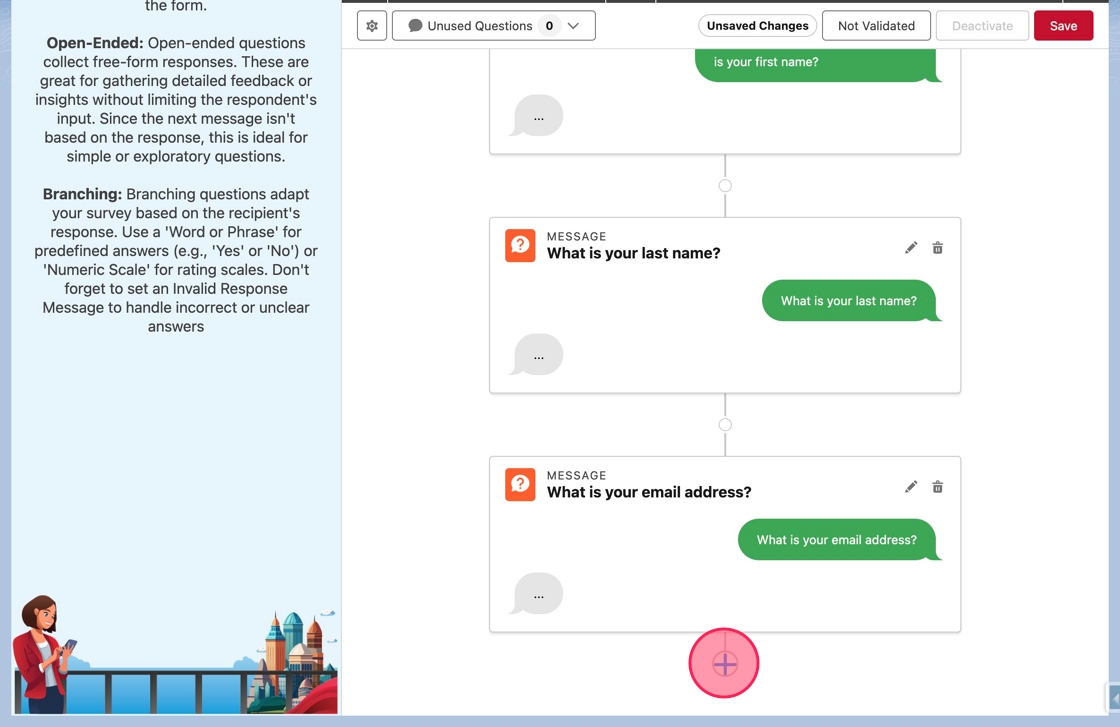
23. The modal will close and the new question will appear on the canvas. Click the Add Question node at the bottom to add another question.
24. Again, click Open-Ended to add a new Open-Ended question.
25. The Add Open-Ended Question modal will appear as before. Click or tab into the Message Text field. Type What is your email address? in the field. Click Add to add the third question.
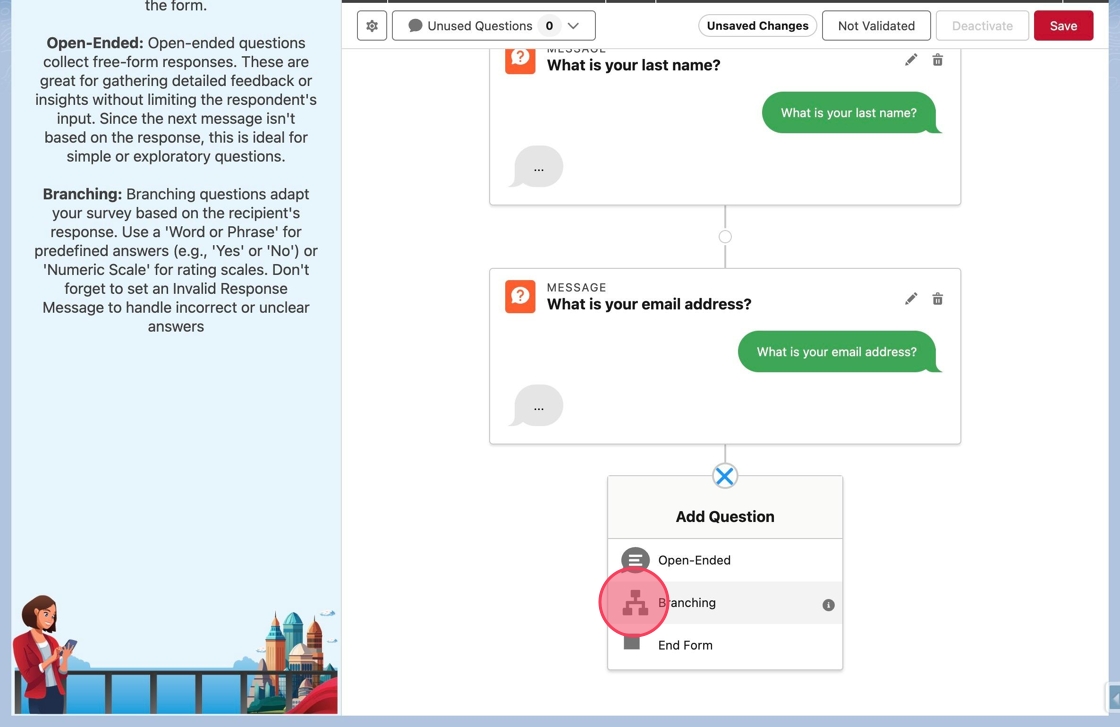
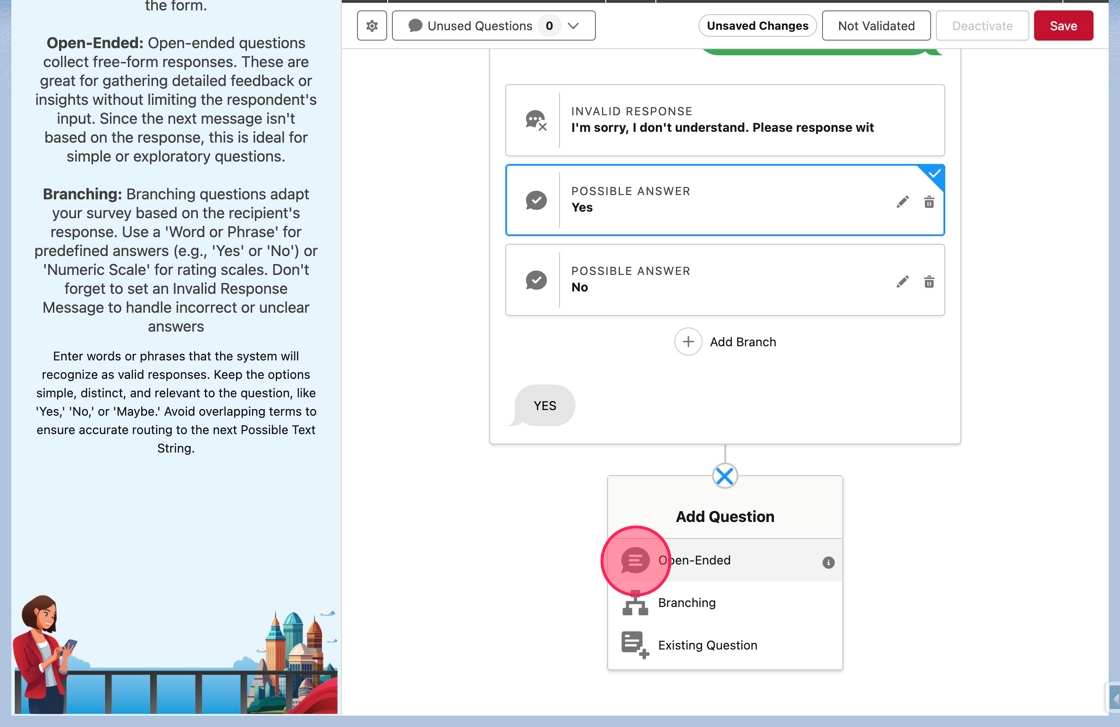
26. Now the form will ask three open-ended questions. To add a branching questions to capture consent, click the Add Question node again.
27. This time choose Branching from the menu.
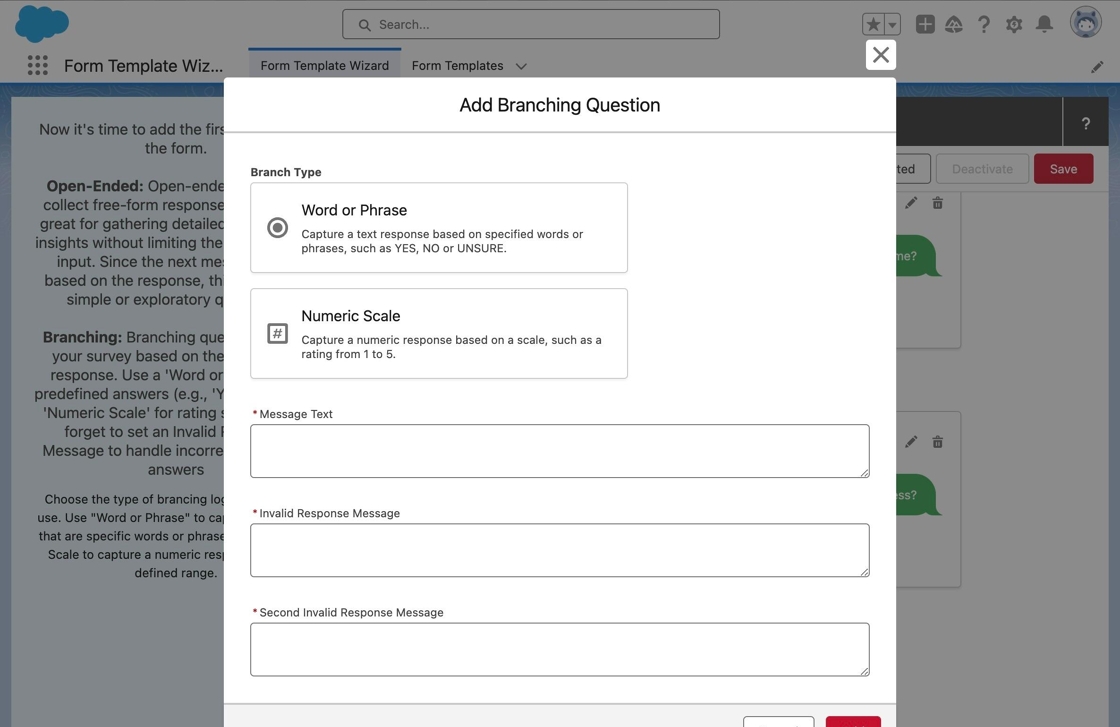
28. The Add Branching Question modal will appear.
Branching questions require a Branch Type to be selected. The Branch Type determines if responses will be a collection of words or phrases or if they will be numeric.
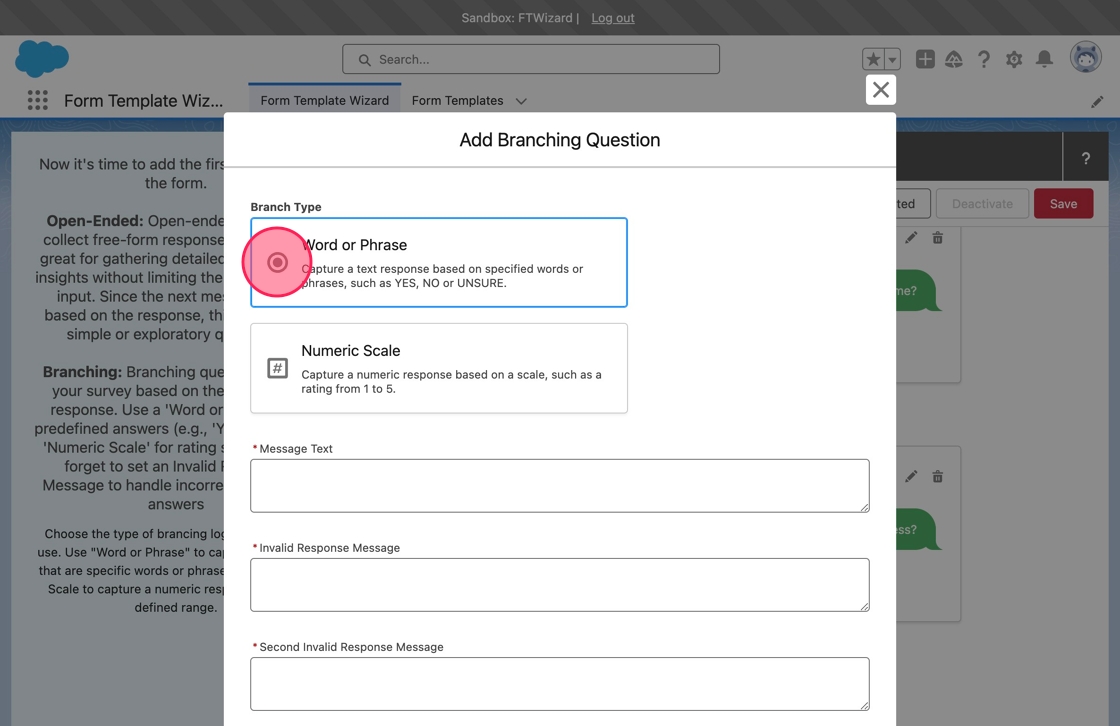
29. Since the form will expect a yes/no response, click on Word or Phrase.
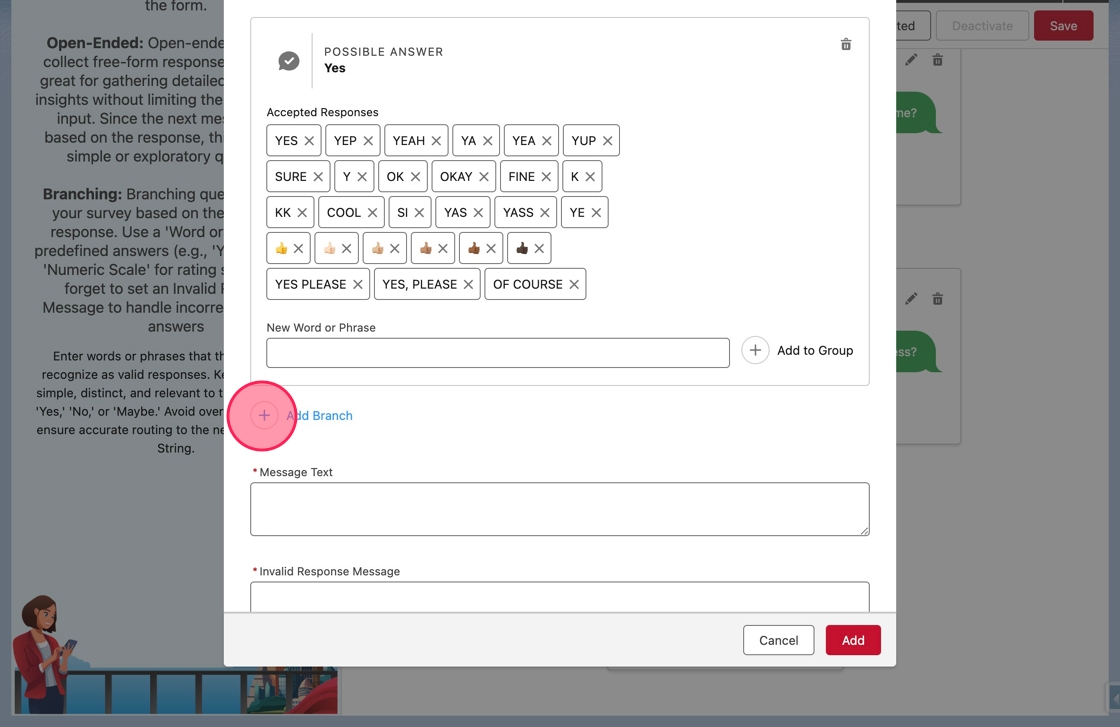
30. The first Possible Answer block will appear. A Possible Answer block represents a branch in the form. For a Word or Phrase branch, the Possible Answer block can accept a series of words or phrases, commonly referred to as a Possible Answer Bank at Mogli.
Click or tab into the New Word or Phrase field.
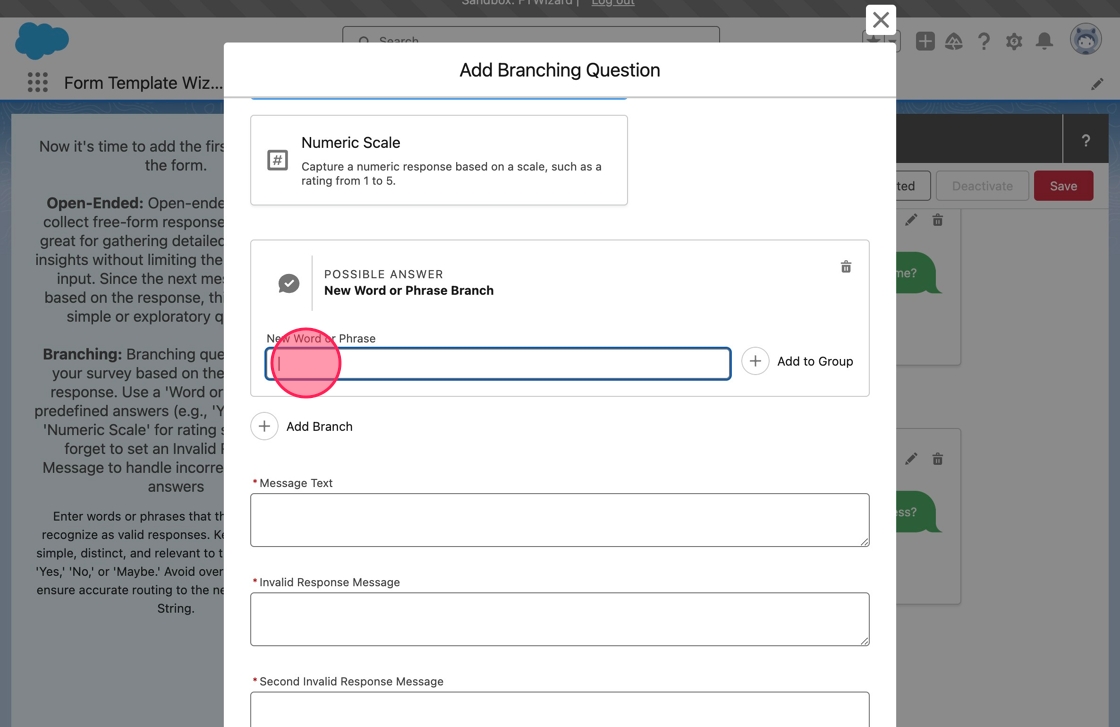
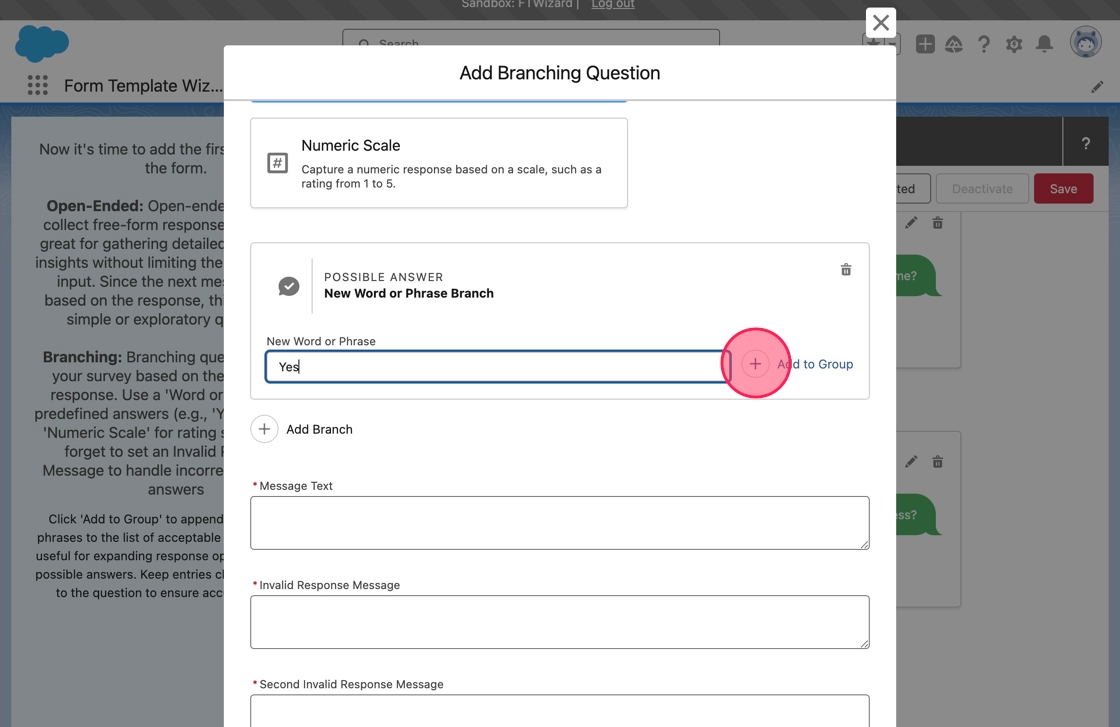
31. Because this first branch will handle affirmative responses, type Yes in the field.
32. Now the word must be added to the group, or bank, of possible responses. Click Add to Group to add it to the Possible Answer block.
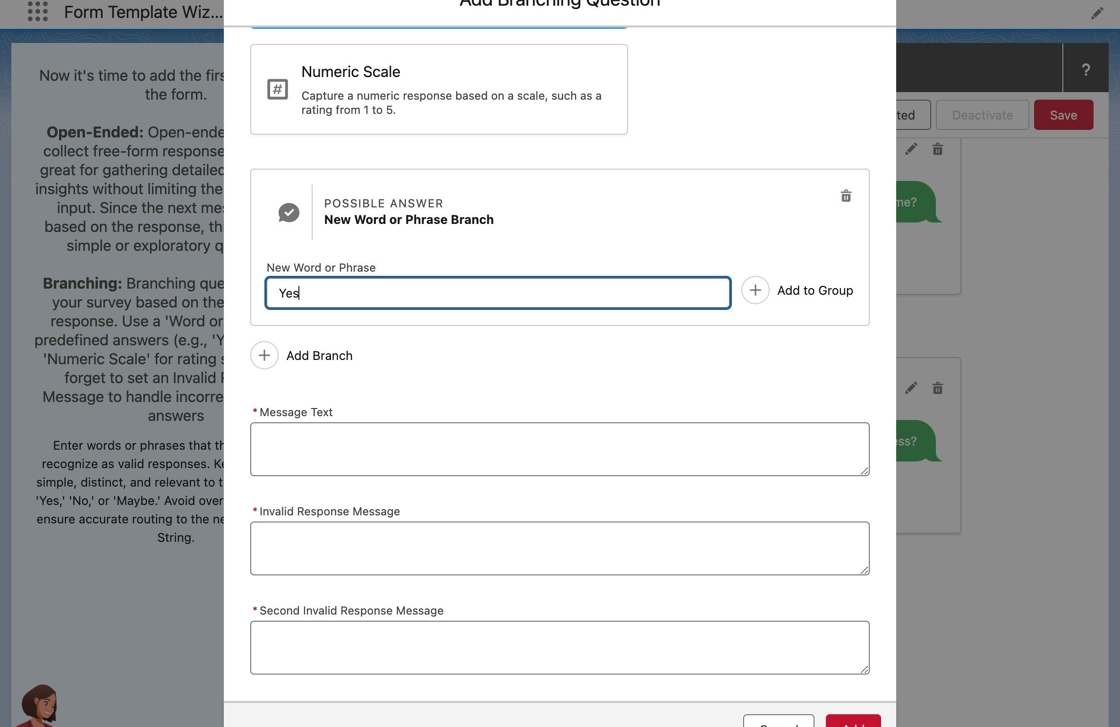
33. After adding the first word or phrase, an Accepted Responses section will appear in the Possible Answer Block. Yes will appear as a pill in the section.
Additionally, notice a magic wand has appeared. The wizard recognized the word Yes as a response that appears in a known Possible Answer Bank.
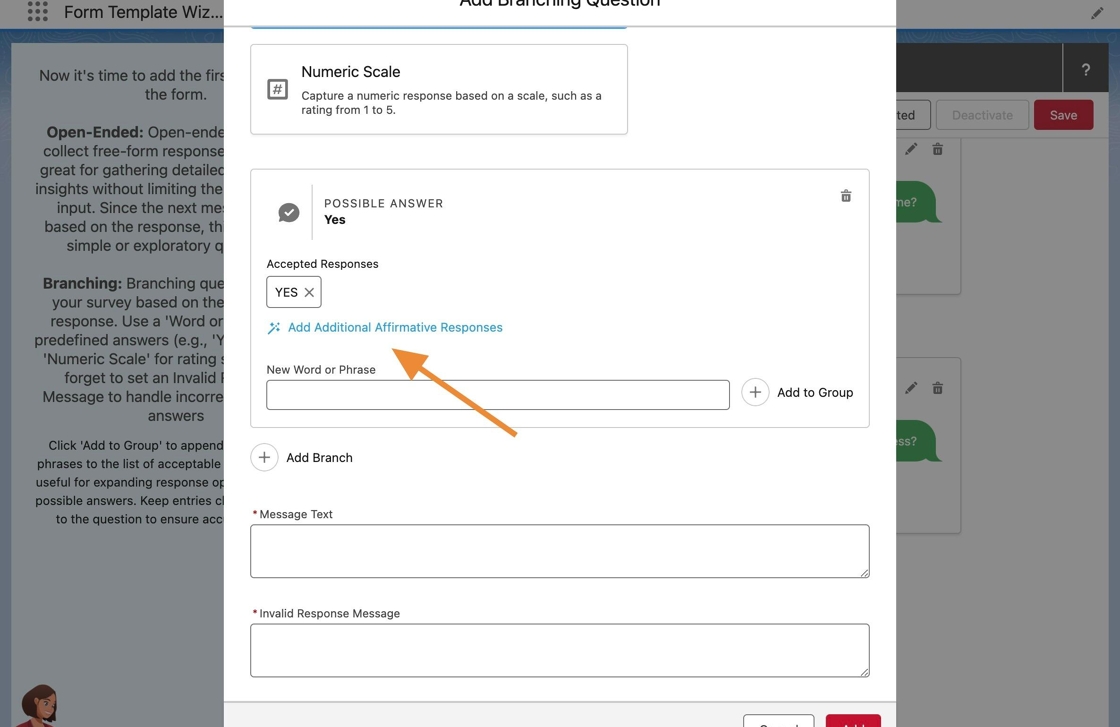
34. Click Add Additional Affirmative Responses to automatically add additional accepted responses.
![]()
35. The additional words and phrases from the affirmative response bank are adding automatically to the Accepted Responses.
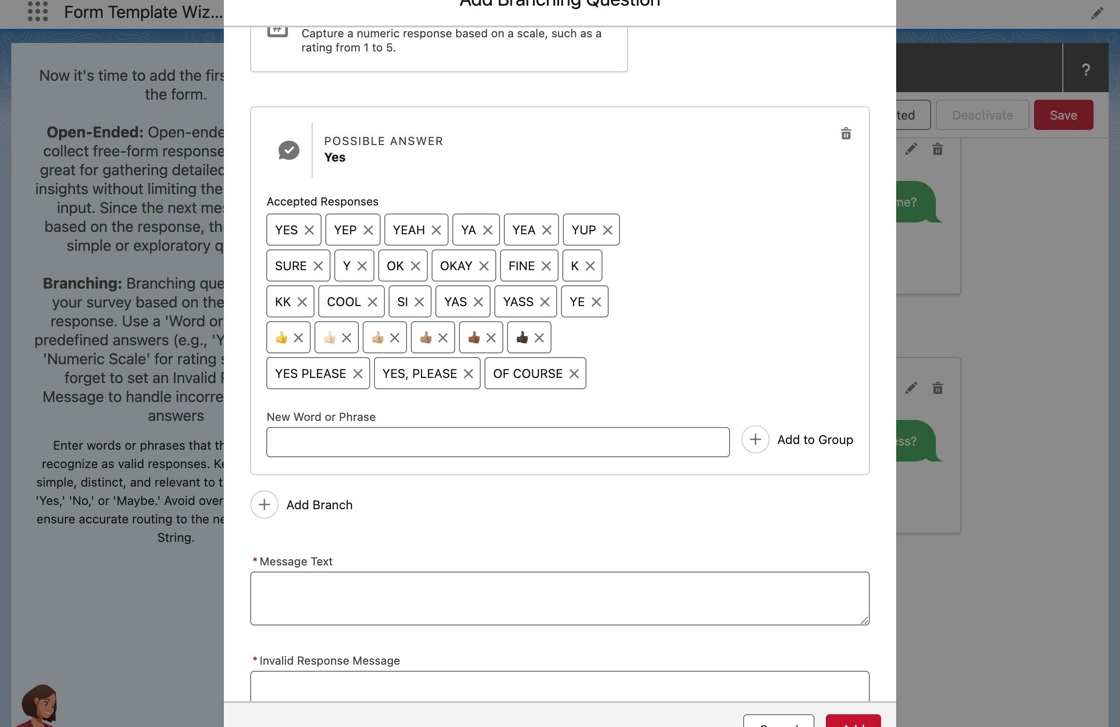
Tip: Current the Form Template Wizard is preloaded with the following Mogli Possible Answer Banks: Affirmative Responses (Yes), Negative Responses (No), Uncertain Responses (Unsure), and US States.
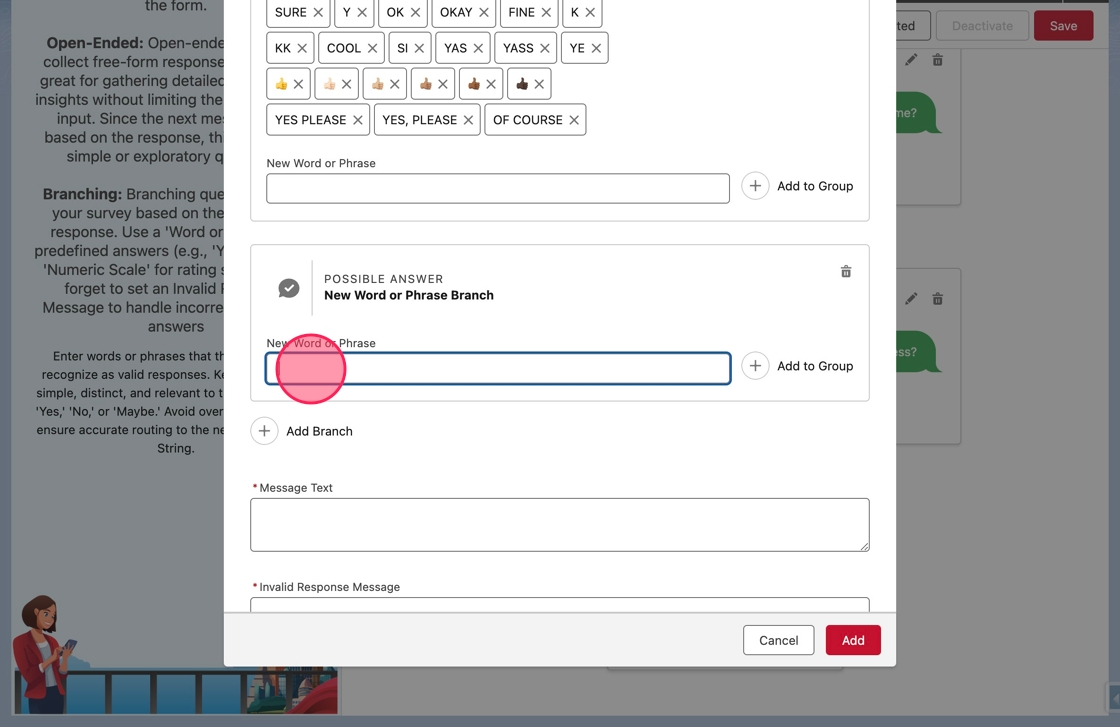
36. With the affirmative branch complete, a new branch needs added to specify the negative responses. Click Add Branch to add a new branch, or Possible Answer, to the question.
37. Another Possible Answer block will appear.
Click or tab into the New Word or Phrase field.
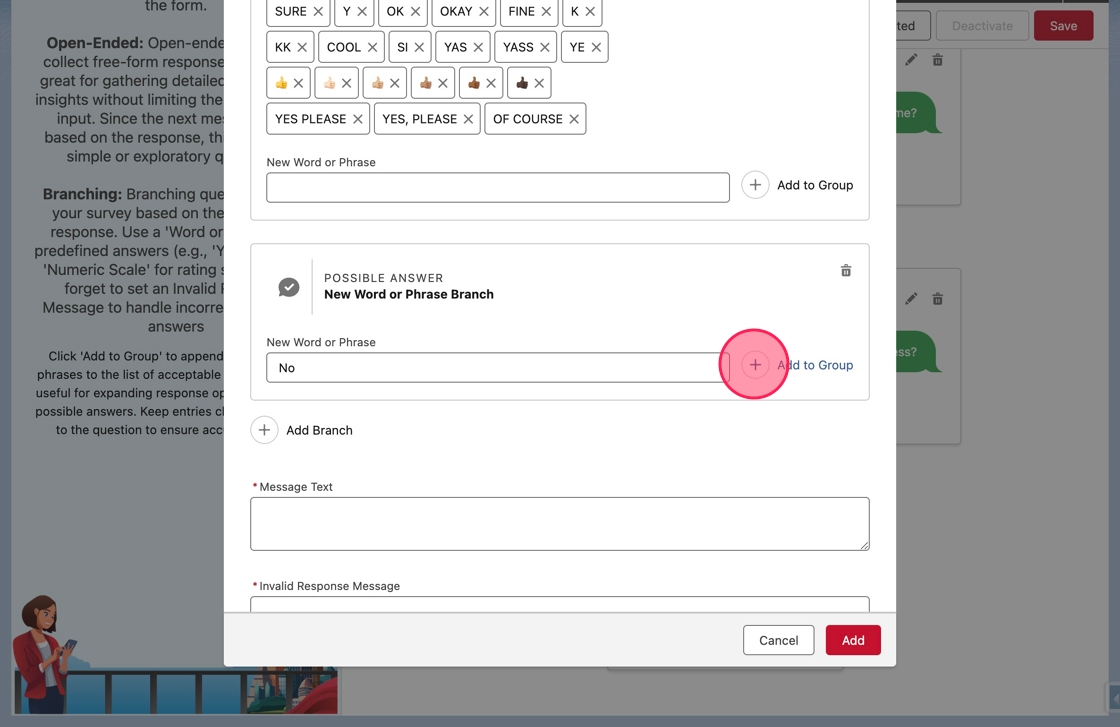
38. Type No in the field, and click Add to Group.
39. No now appears in the Accepted Responses.
Similarly, click Add Additional Negative Responses to add the remaining negative words and phrases from the bank automatically.
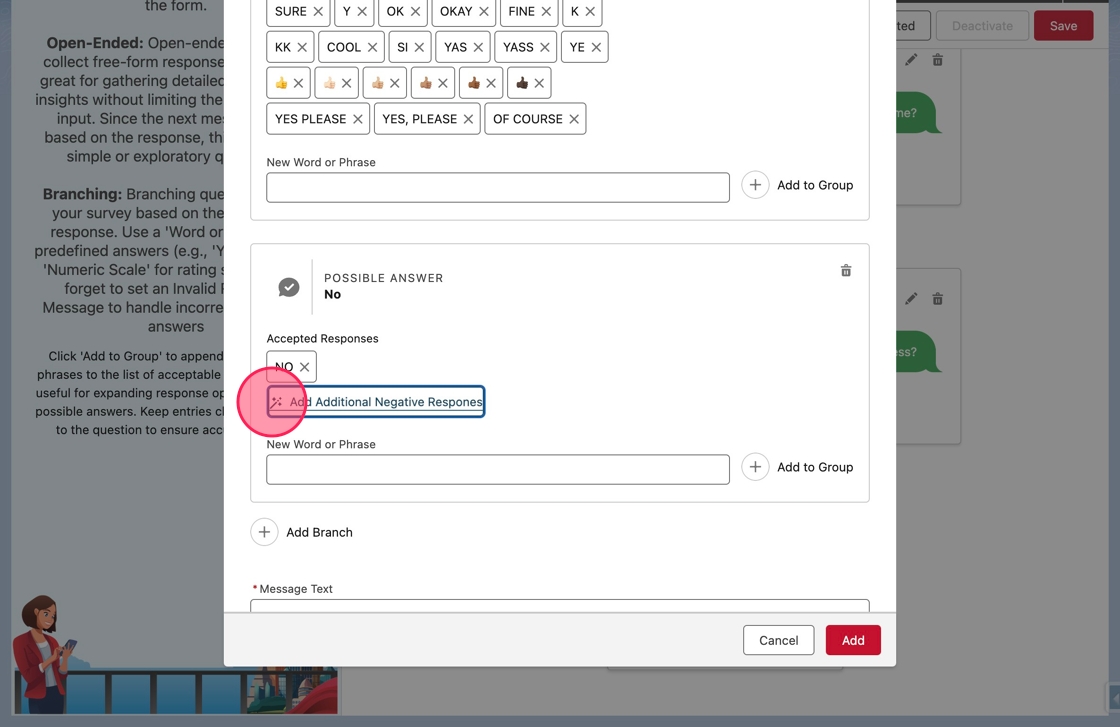
40. The remaining responses will be added to the Accepted Responses.
Click or tab into the Message Text field.
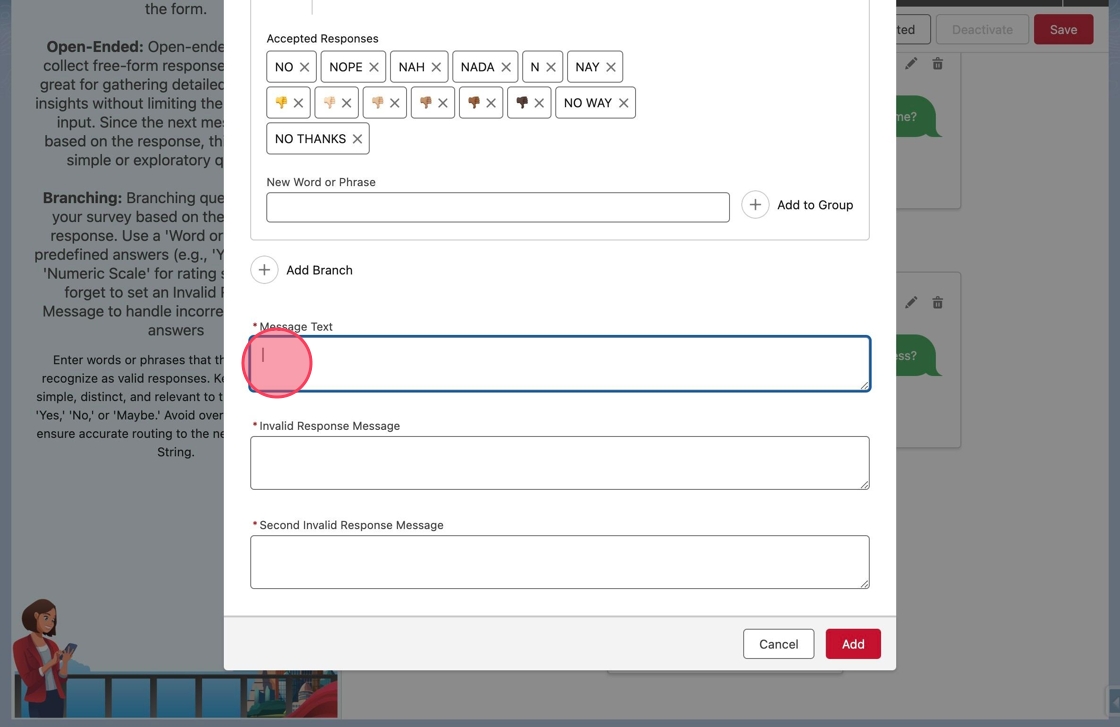
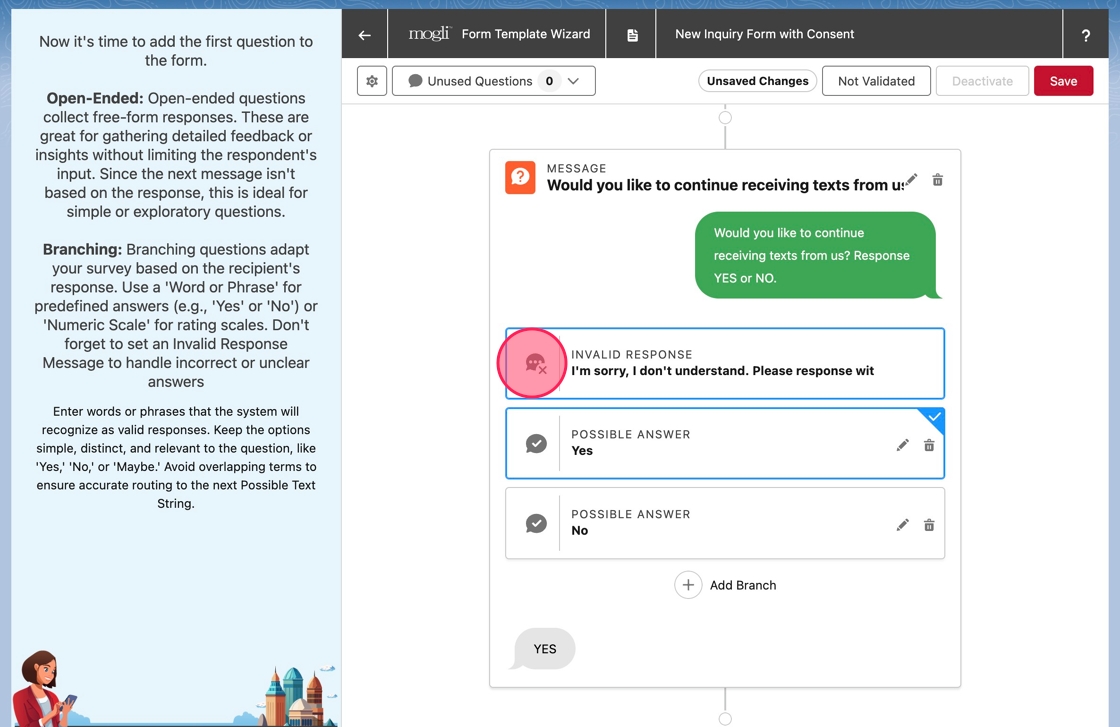
41. Type Would you like to continue receiving texts from us? Respond YES or NO. into the field.
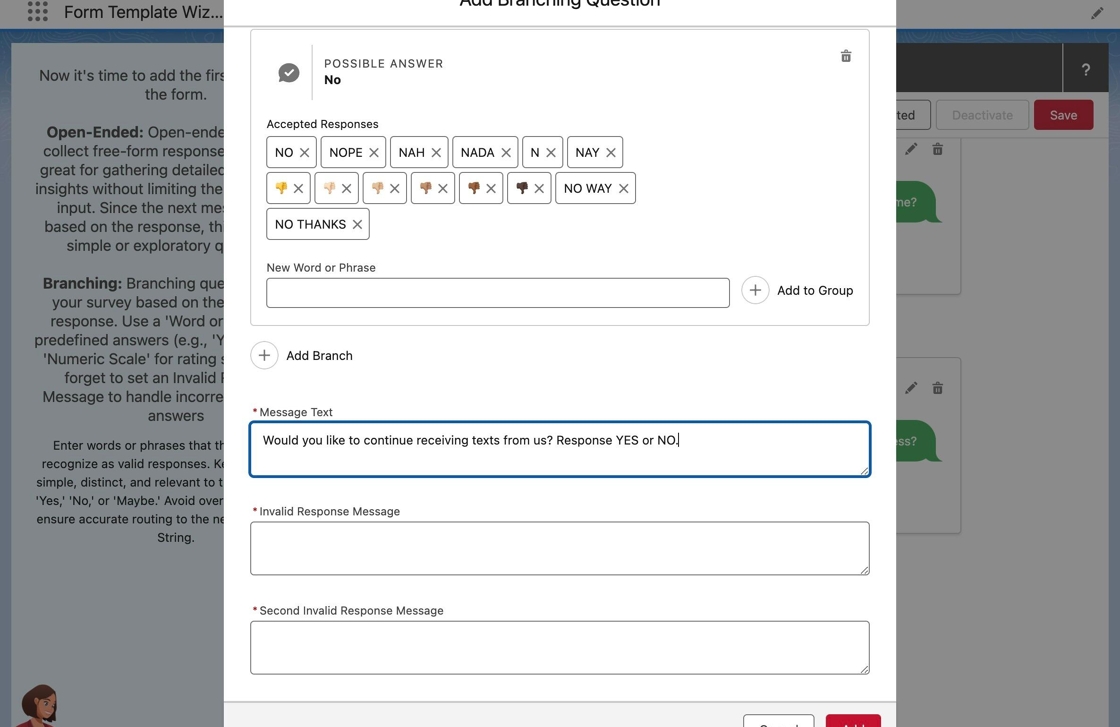
42. Click or tab into the Invalid Response Message field.
The Invalid Response Message is commonly called the Miss Question. This is the message sent to a respondent when their previous response did not match one of the accepted responses.
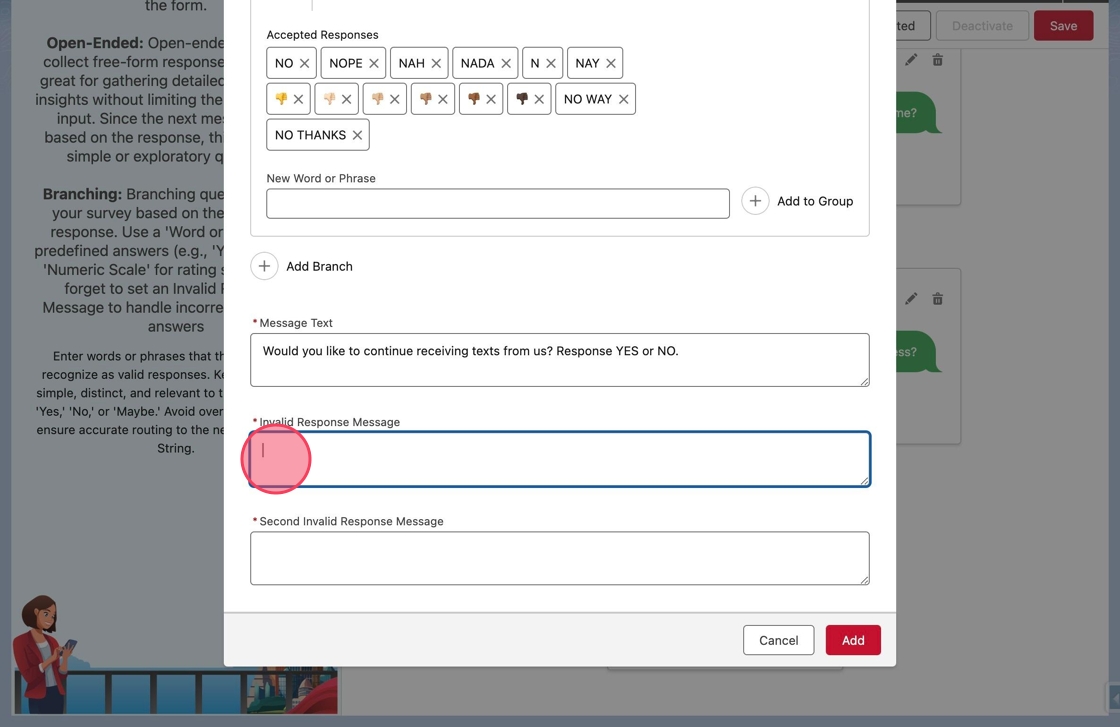
43. Type I don't understand. Please respond with YES or NO. in the field.
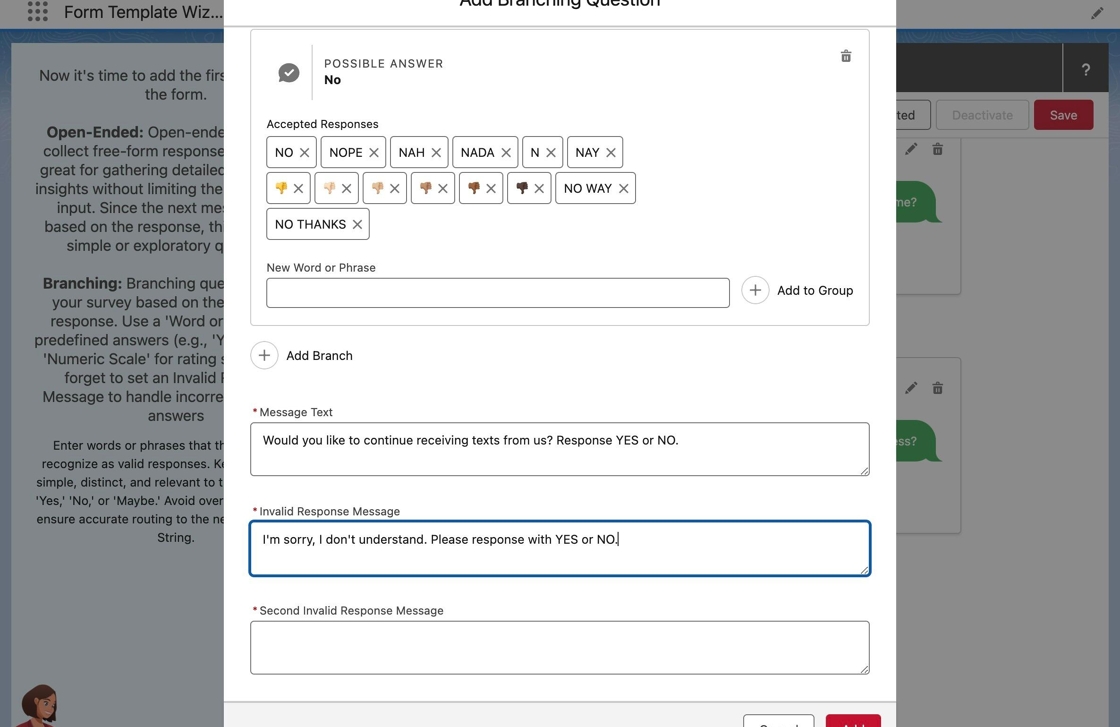
Tip: The Form Template Wizard simplifies creating Miss Questions. There is no need to duplicate branches or Possible Answers for the Miss Questions. The wizard automatically creates and associates matching branches. It also synchronizes any changes made later. to the branches.
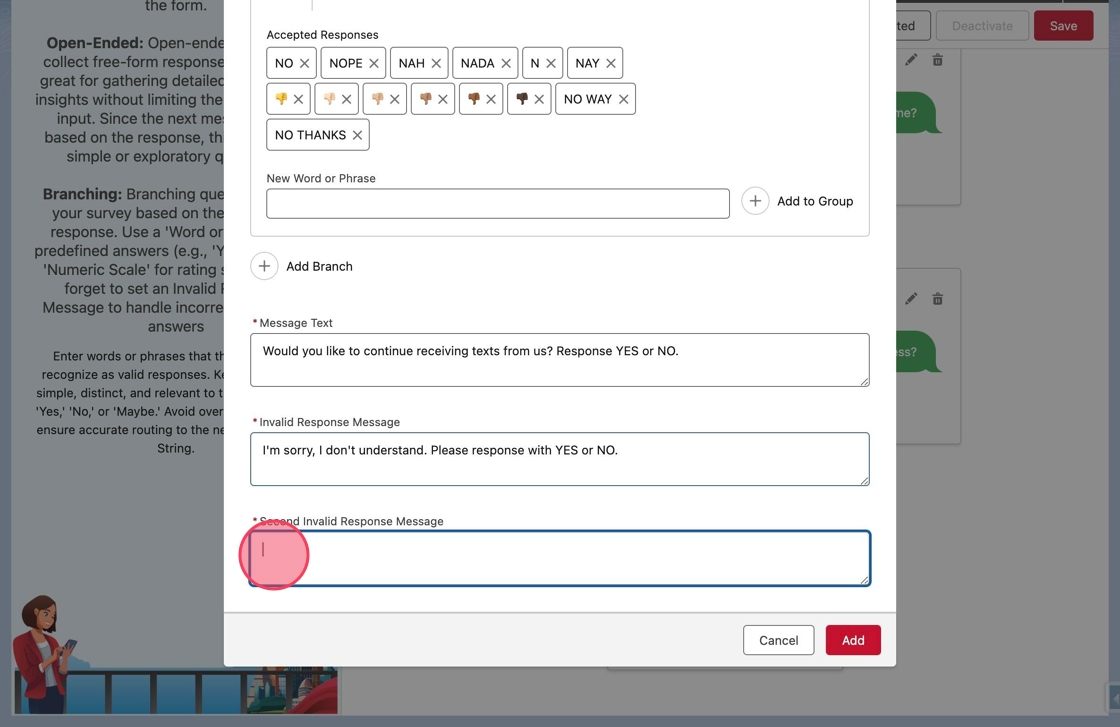
44. Click or tab into the Second Invalid Response Message field.
The Second Invalid Response Message is commonly called the Double Miss Question. This is the message sent to a respondent when their previous two responses did not match one of the accepted responses.
45. Type I still don't understand. Text GETINFO to start over. in the field.
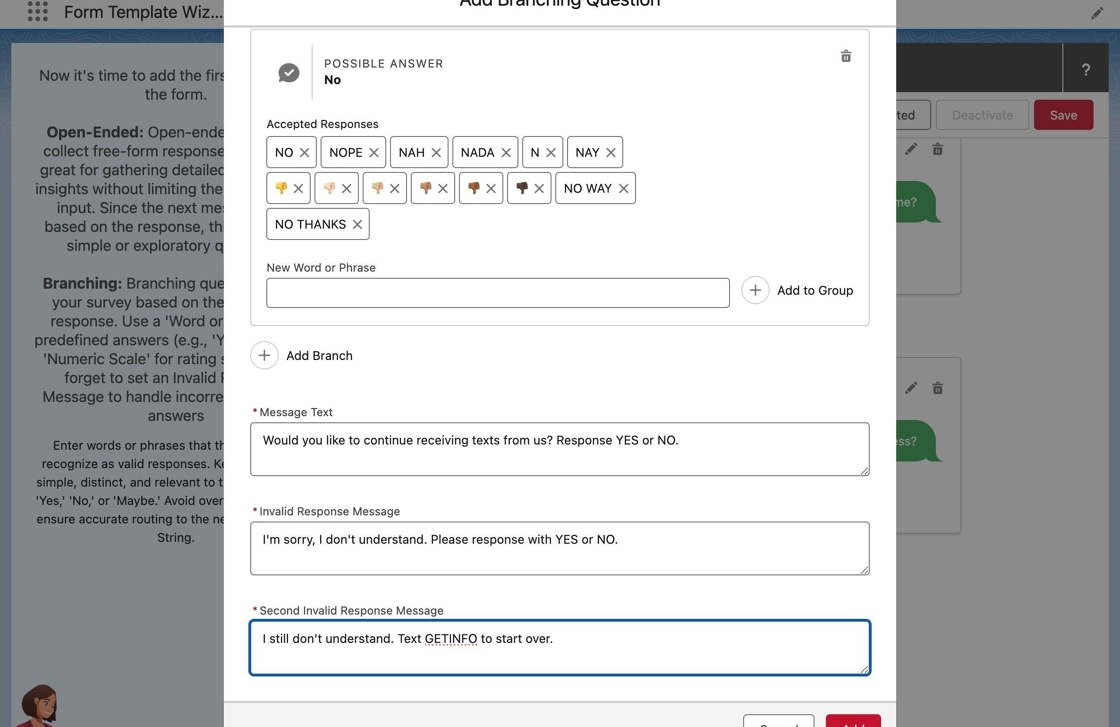
Tip: Similar to Miss Questions, the Form Template Wizard streamlines creating Double Miss Questions and automatically toggles the question to complete the form.
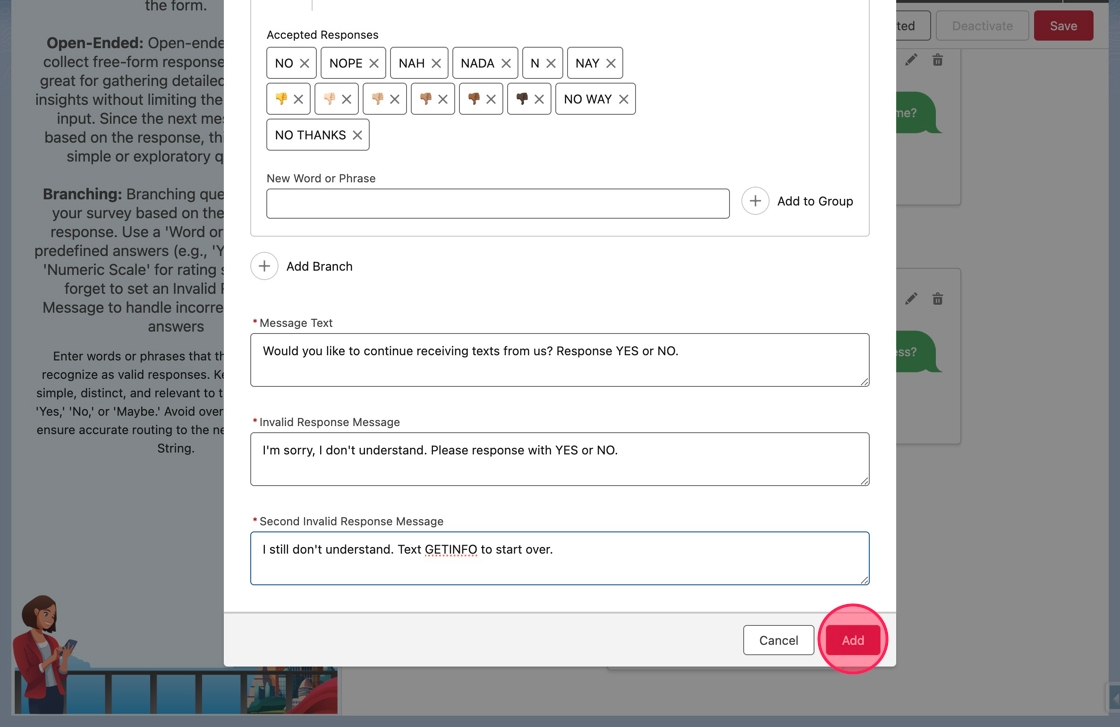
46. Click Add to add the branching question and two invalid response questions to the form.
47. The Add Branching Question modal will close and the new branching question will appear on the canvas.
Below the message, the Invalid Response (Miss Question) and branches (Possible Answers) will be listed. By default, the first Possible Answer will be selected.
The canvas will display the subsequent questions of the selected branch.
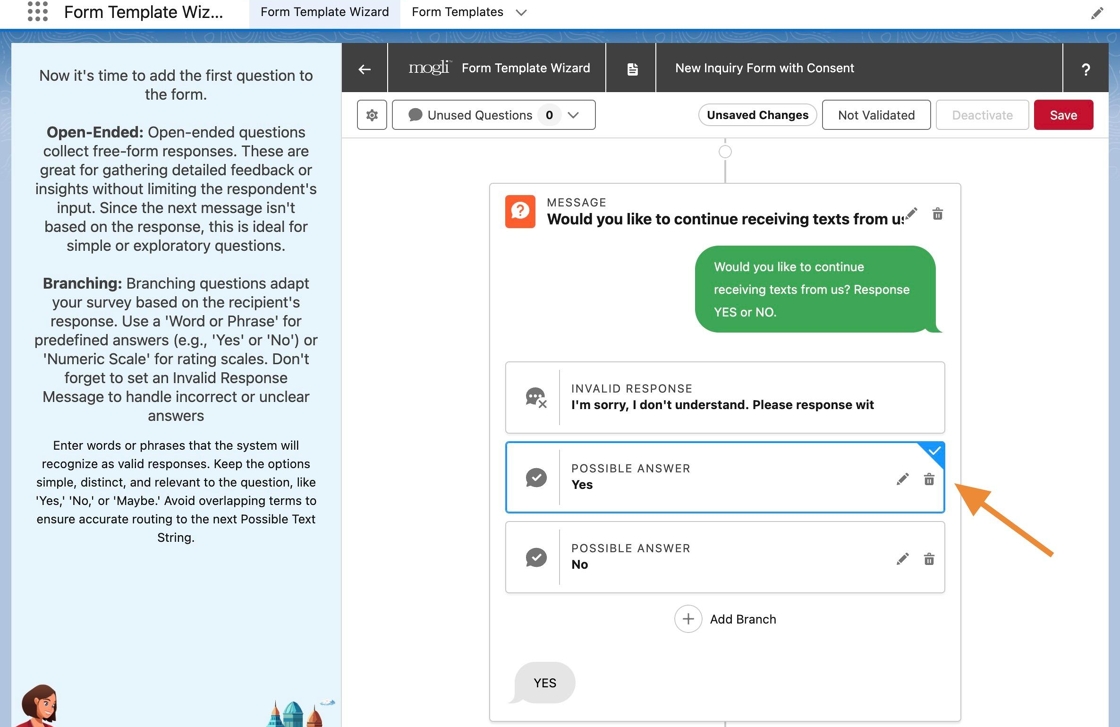
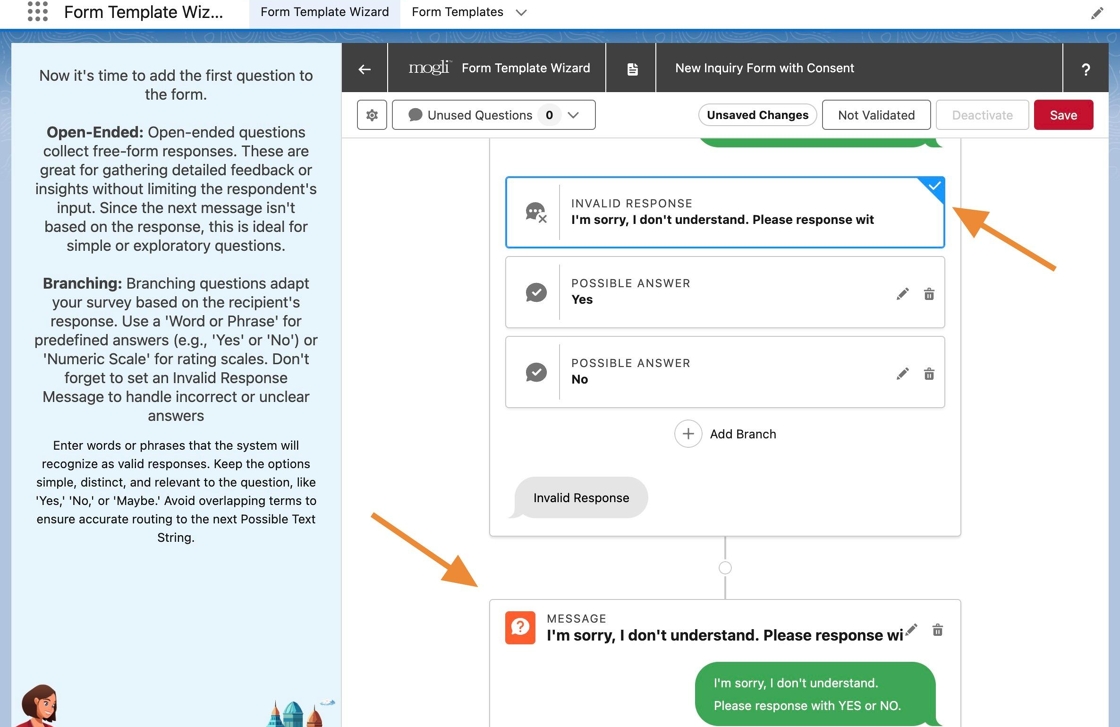
48. For example, click the Invalid Response to change the branch.
49. Notice after selecting the Invalid Response branch, the canvas changes. It reflects the path a respondent will take when their first response is invalid.
They will receive the Invalid Response Message.
50. Scrolling down, notice the branches of the Invalid Response, or Miss Question, are listed. They are identical to those created for the branching question.
By default again, the first Possible Answer branch is selected.

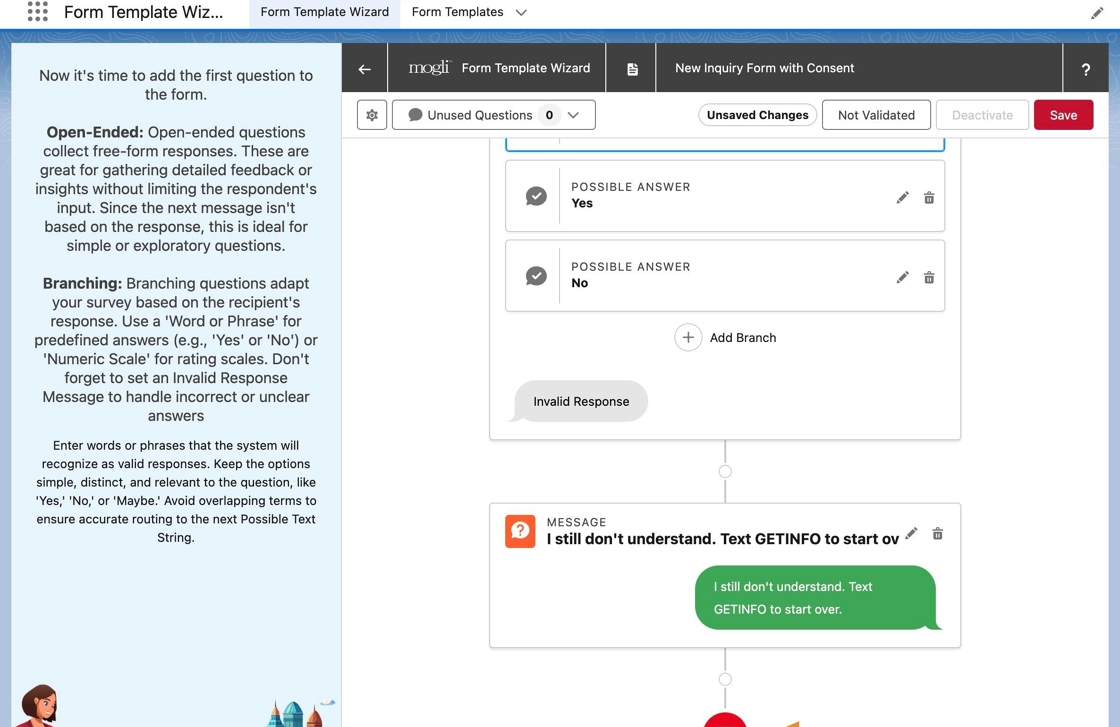
51. Click on the Invalid Response branch. This represents the Second Invalid Response or Double Miss Question.

52. Now the canvas reflects the path of the Second Invalid Response, or the Double Miss Question.
Notice the form was automatically completed after sending the Second Invalid Response.
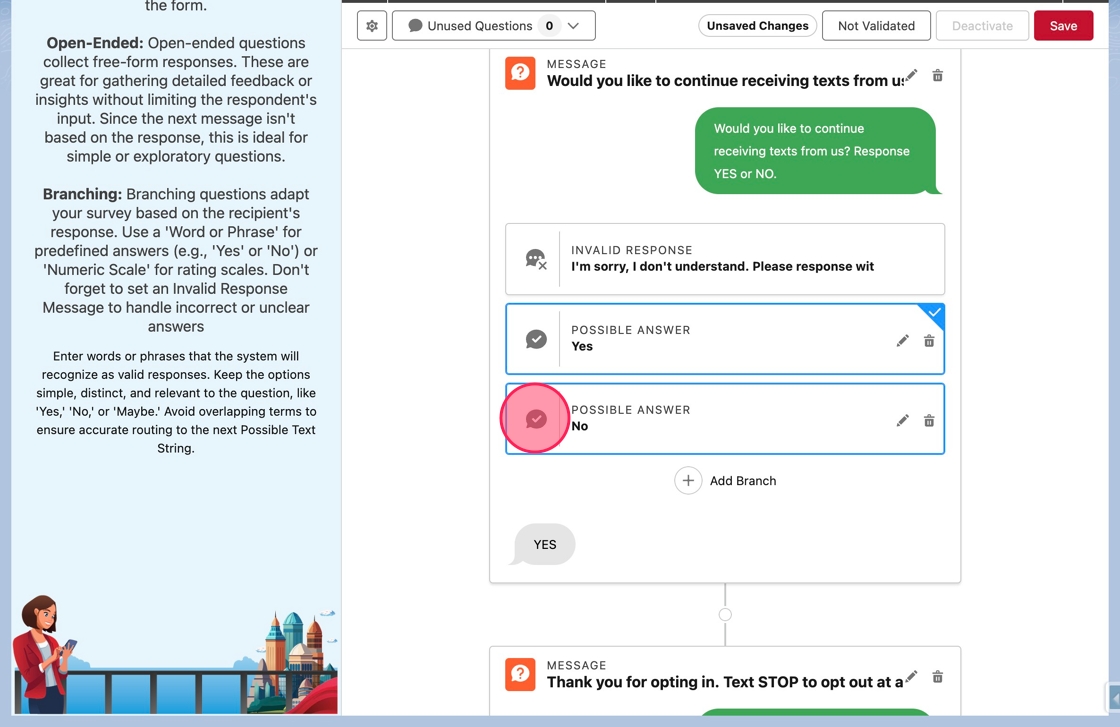
53. Scroll up to the first branching question again, and click the first Possible Answer branch to change back to its path.
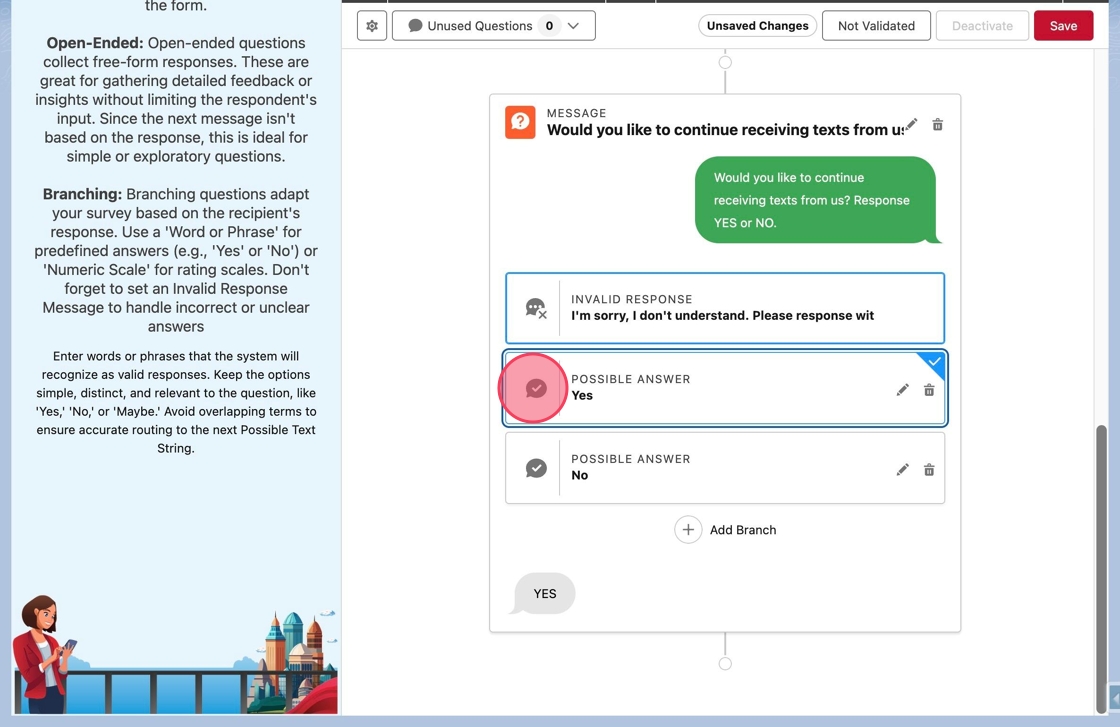
54. Click the Add Question node below the question. This will add a new question after a Yes or affirmative response.

55. Click Open-Ended to add a new open-ended question.
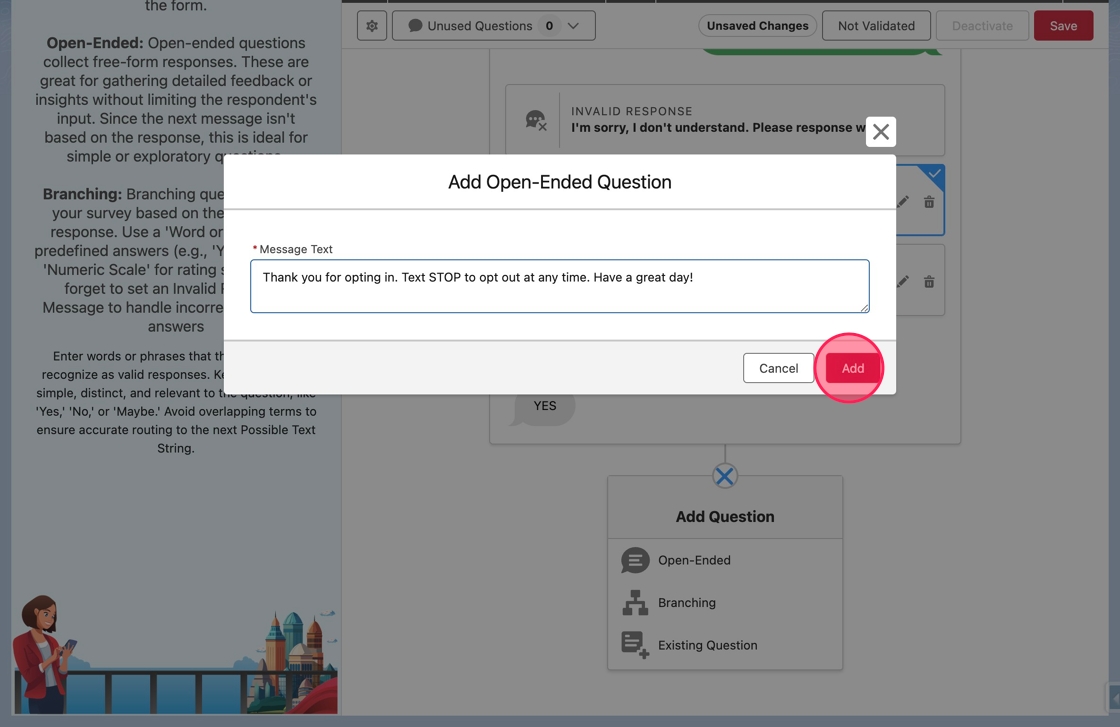
56. Click or tab into the Message Text field.
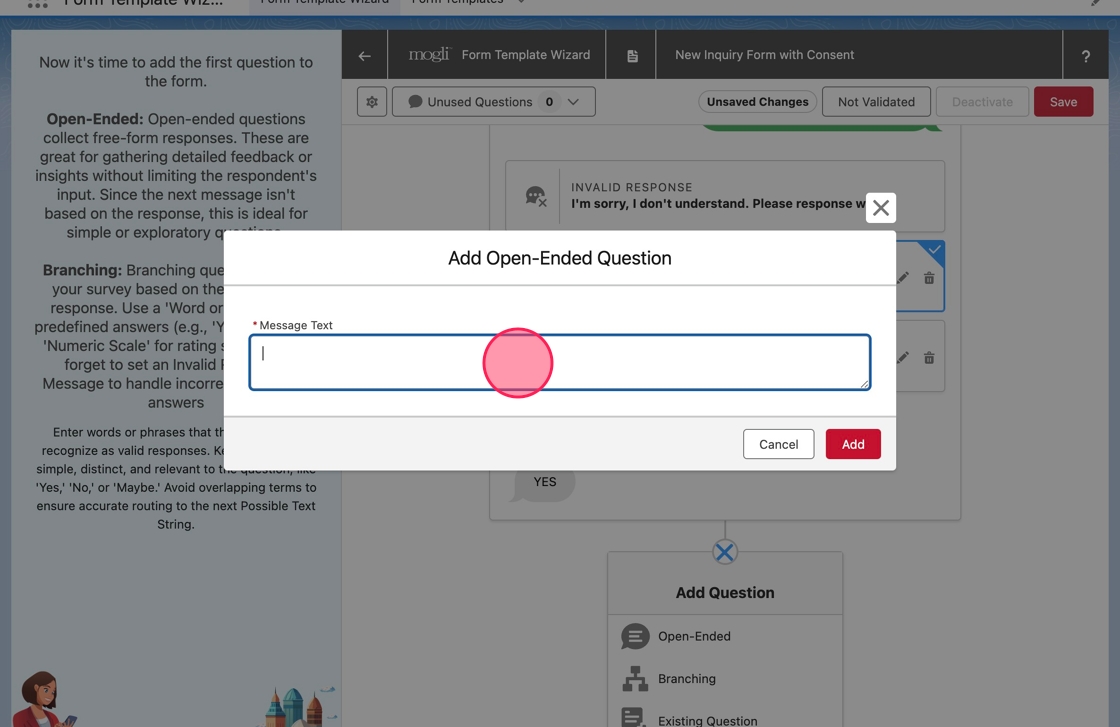
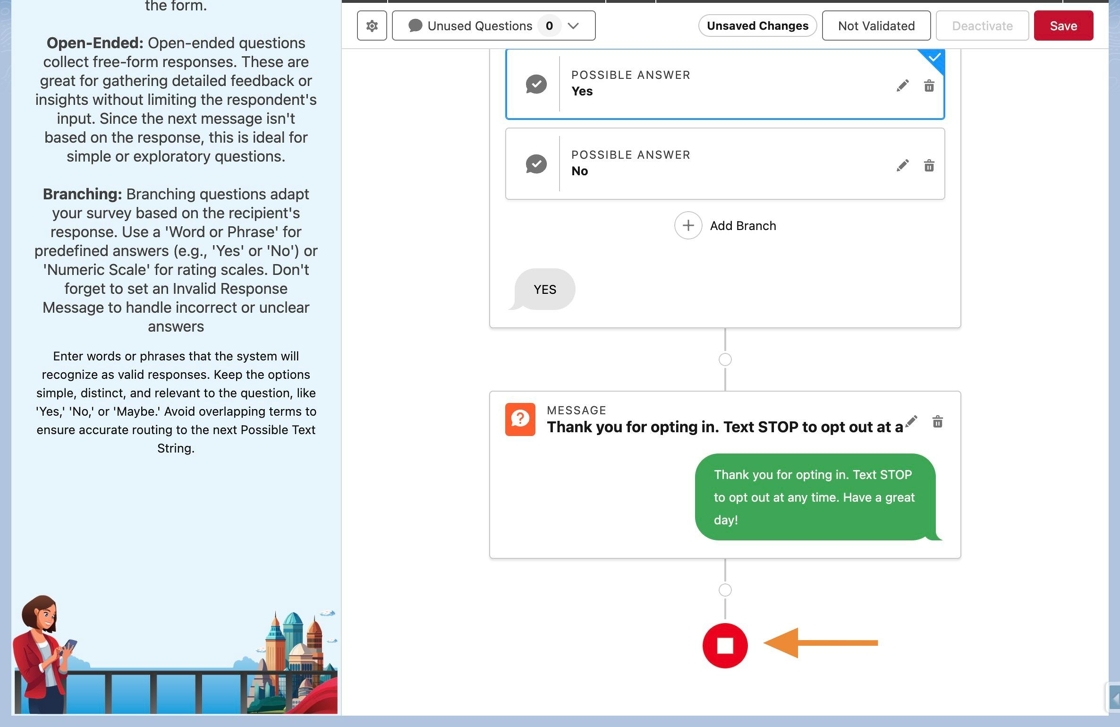
57. Type Thank you for opting in. Text STOP to opt out at any time. Have a great day!, and click Add to add the question.
58. To end the form after this question, click the Add Question node again and select End Form.
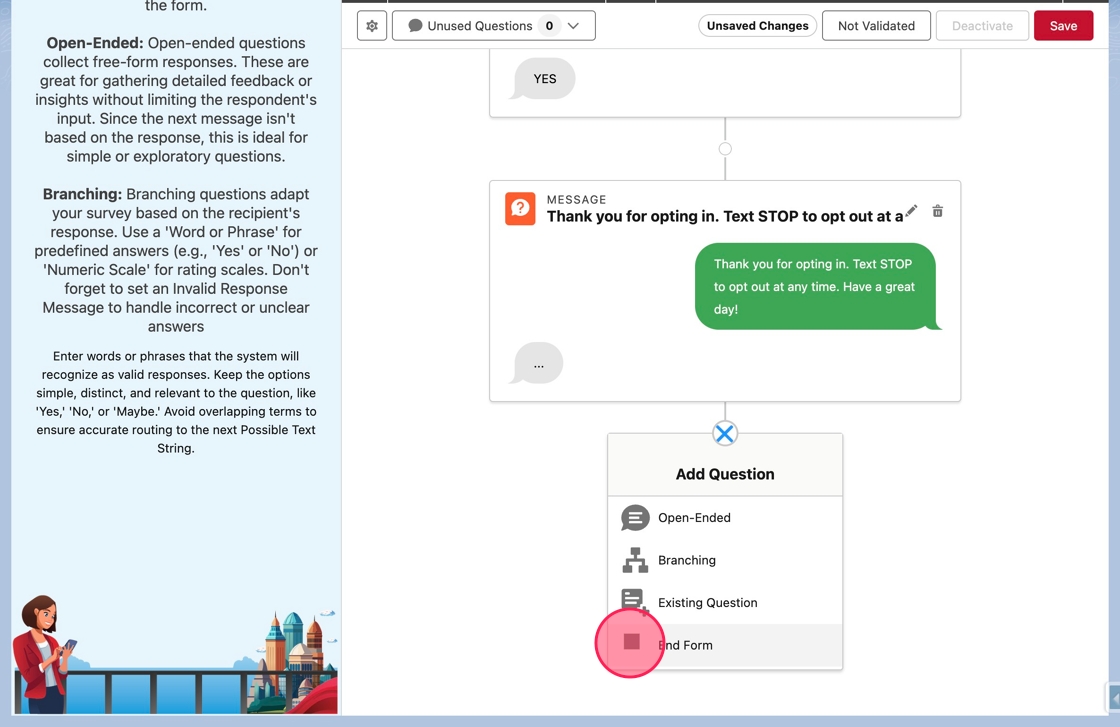
59. The menu will close and an End icon will appear. As before, this indicates that the form will be completed after the previous question.
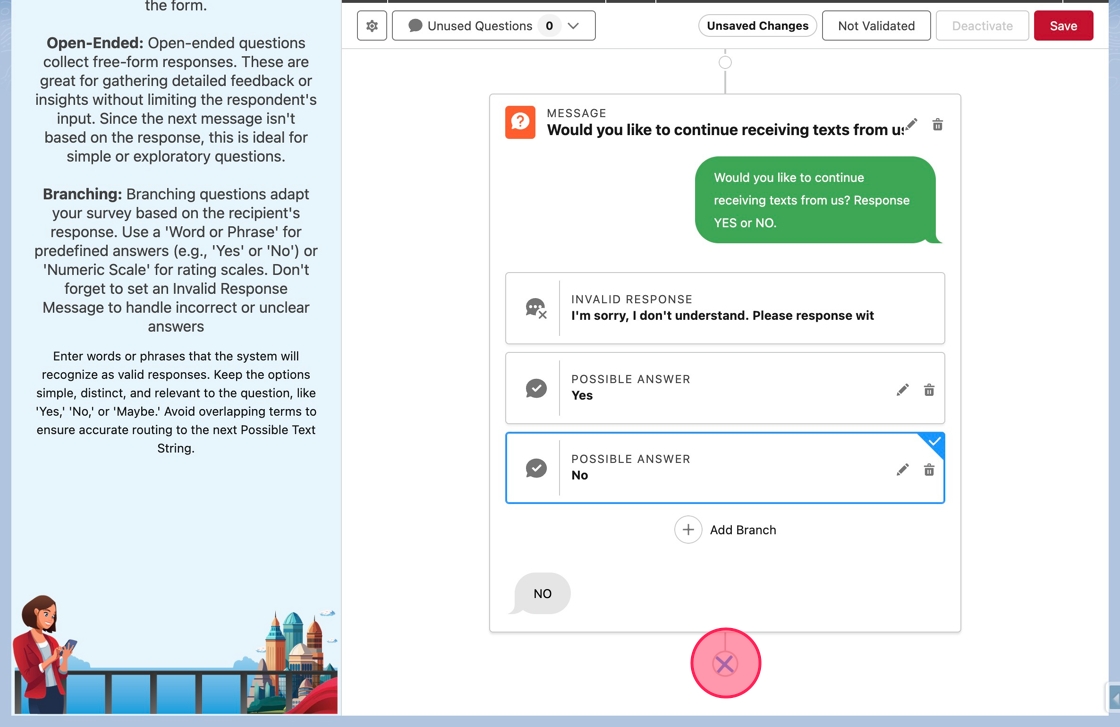
60. Now scroll back up to the first branching question. The path for a negative response needs completed.
Click on the second Possible Answer branch.
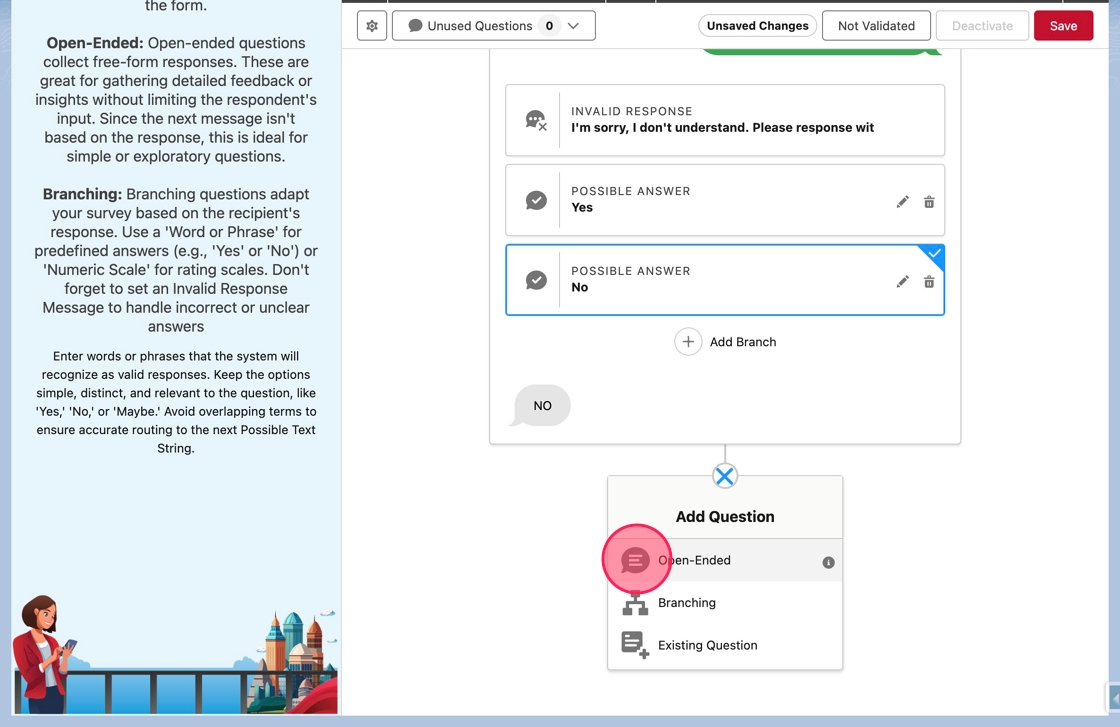
61. Click the Add Question node as before. This will add a new question after a No or negative response.
62. Click Open-Ended to add a new open-ended question.
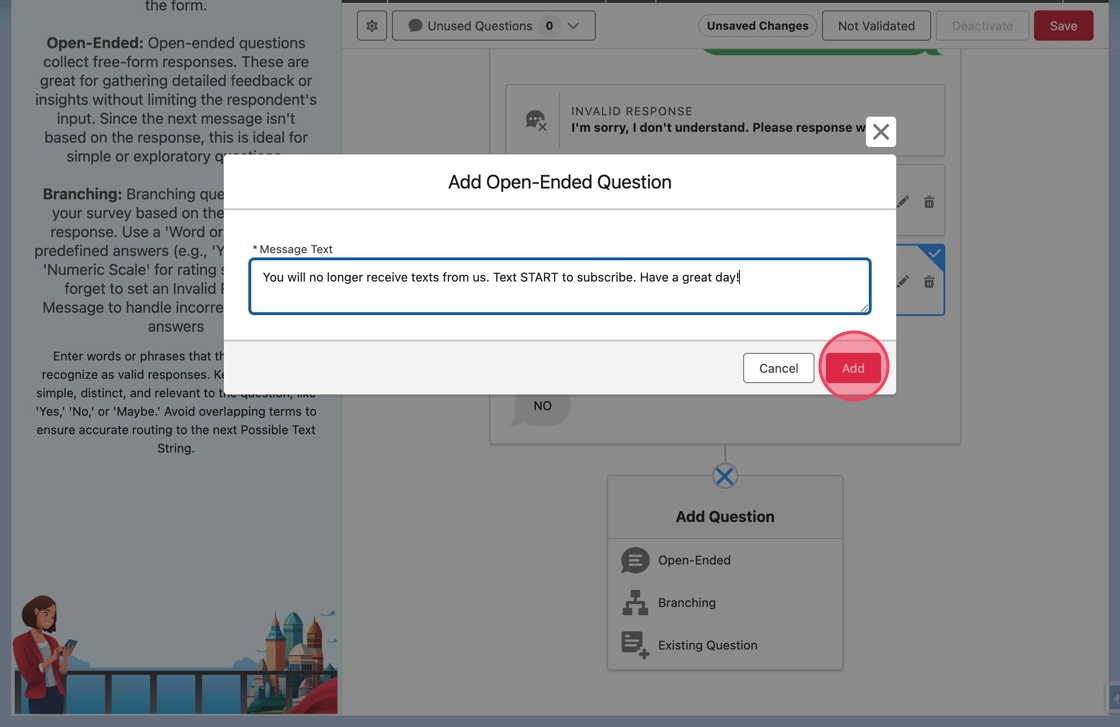
63. Click or tab into the Message Text field.
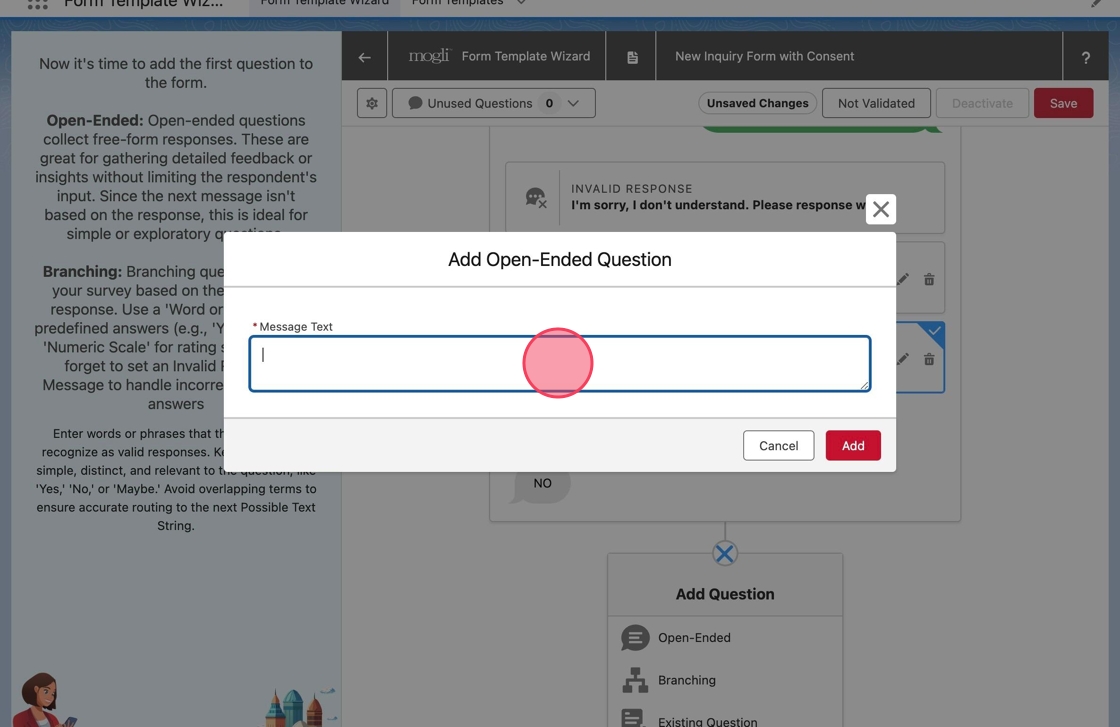
64. Type You will no longer receive texts from us. Text START to subscribe. Have a great day! in the field, and click Add to add it to the form.
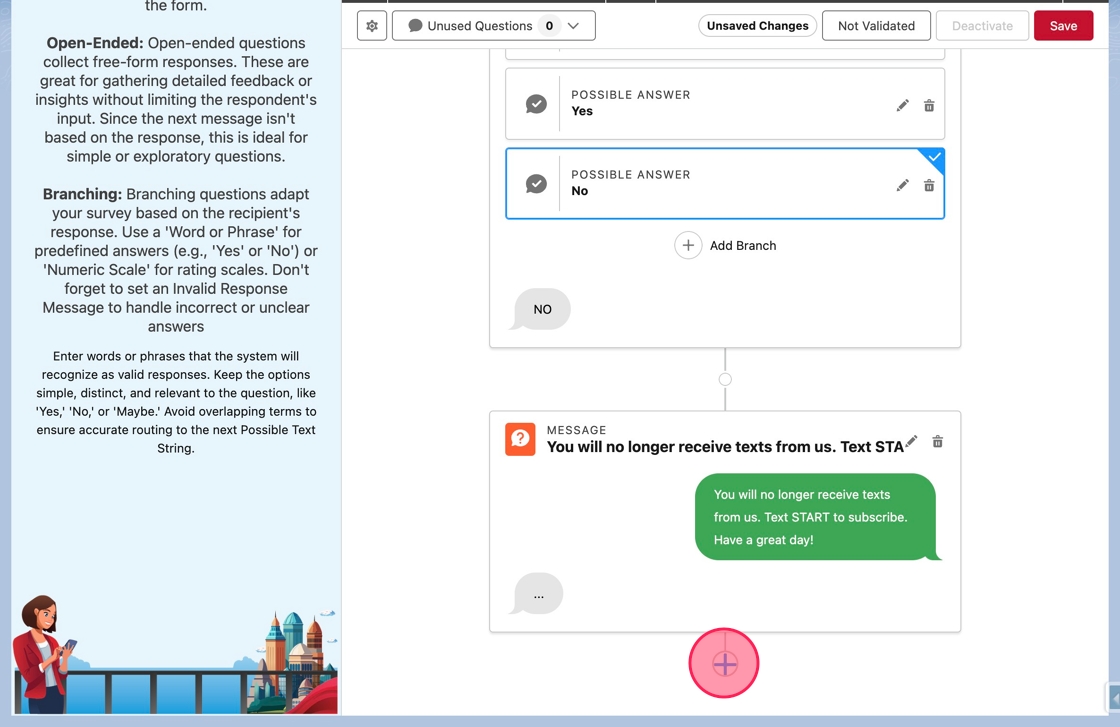
65. Similarly to the affirmative branch, the negative branch needs to be ended. Click the Add Question node after the last question.
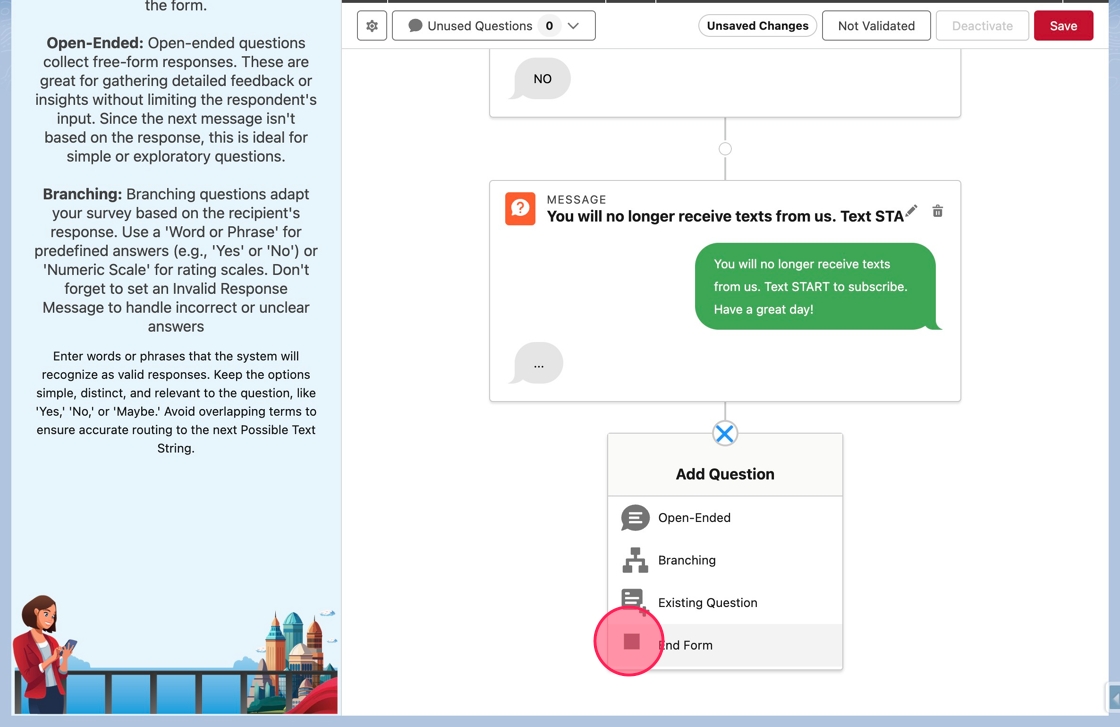
66. Click End Form in the menu.
67. Notice in the toolbar at the top, there is an Unsaved Changes badge noting there are currently changes made to the form that are not saved in Salesforce.
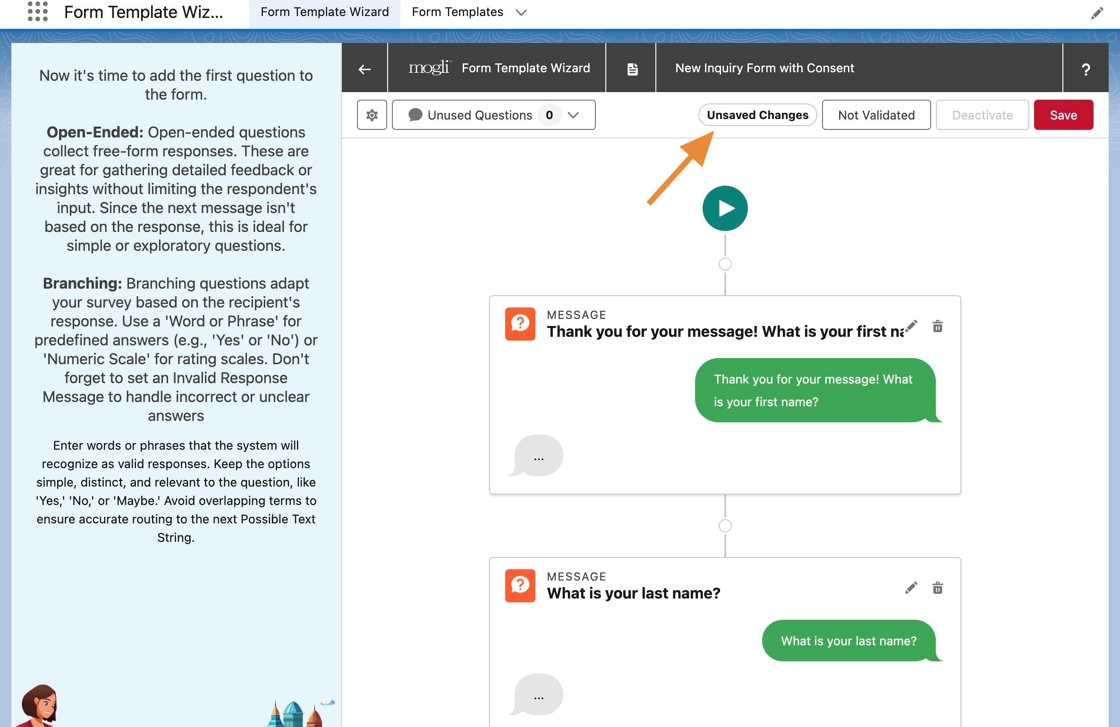
68. Click Save to save these changes.
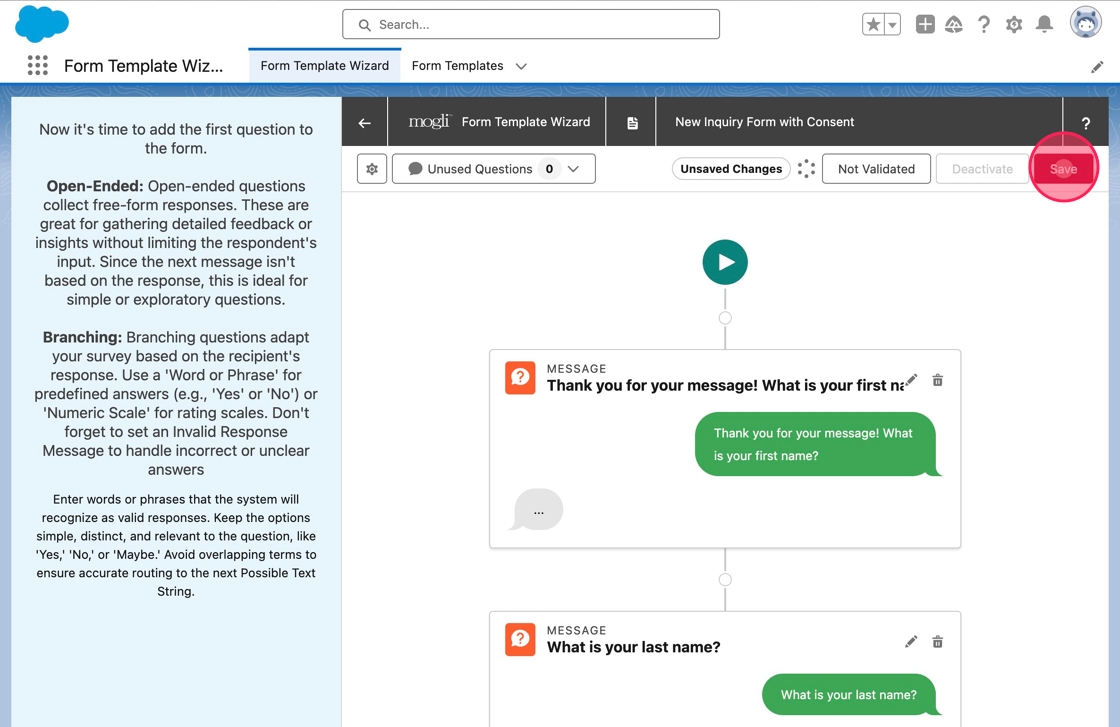
69. Upon save, the Unsaved Changes badge will disappear.

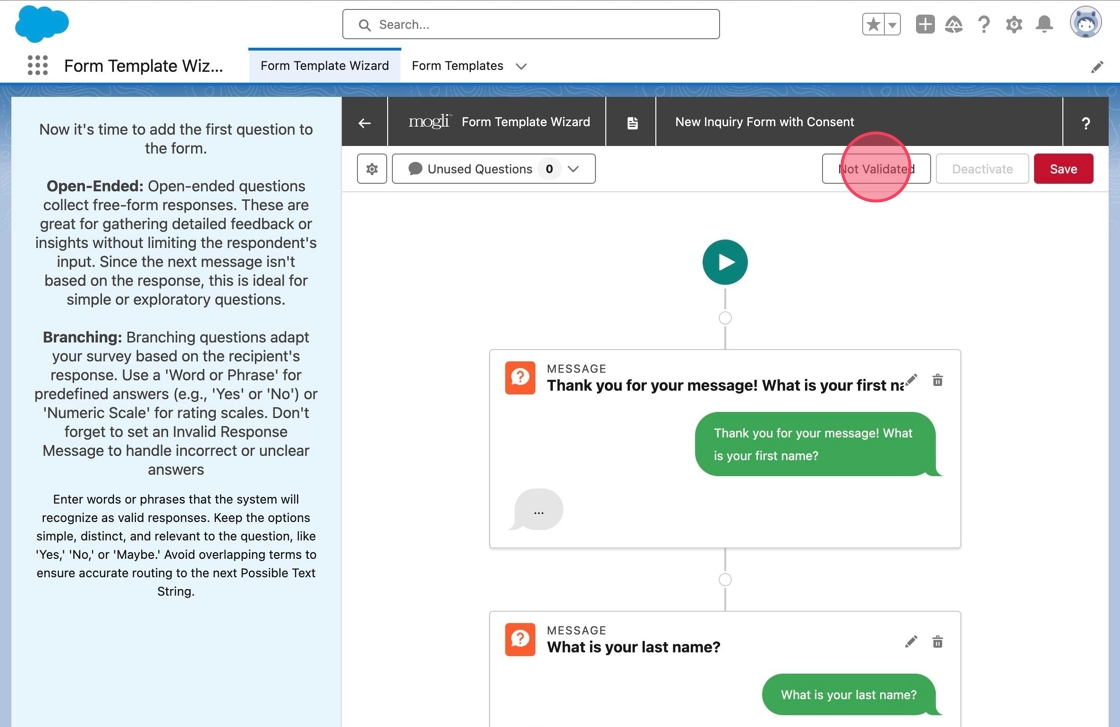
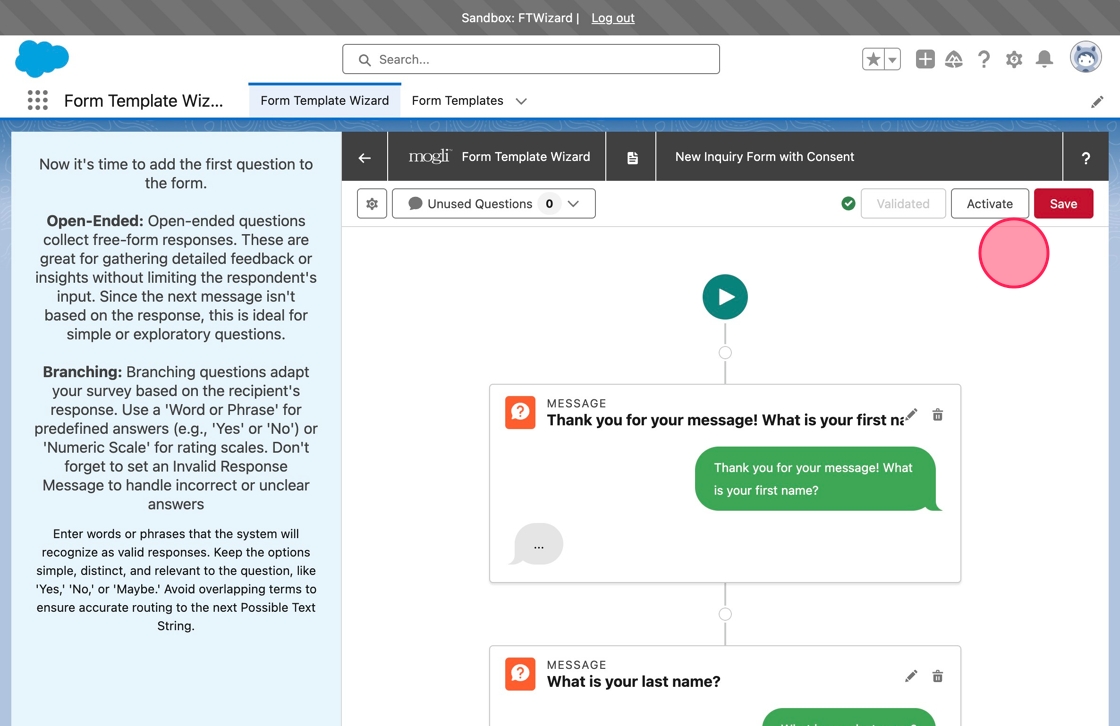
70. Also notice there is a Not Validated button in the toolbar. A form can be validated from the canvas. This runs a process in Salesforce to validate all Question Templates and Possible Answers included in a form. Most notably, it will identify when next questions have not be specified or the form completed. A form cannot be activated until it has been validated.
Click Not Validated to validate the form.
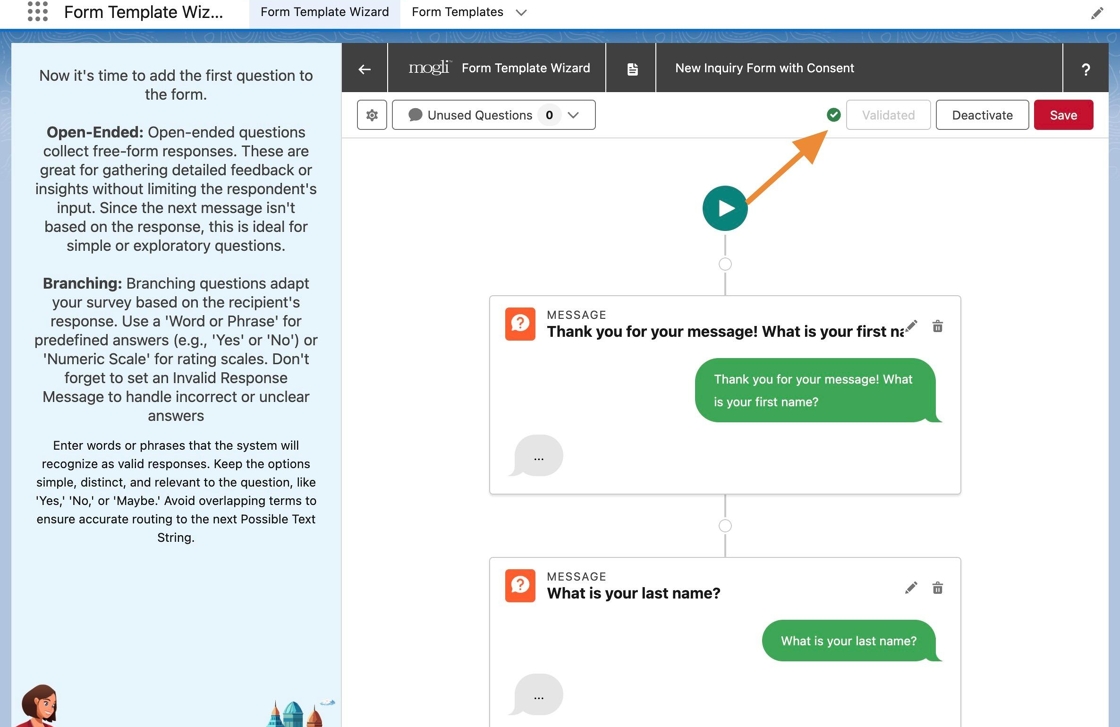
71. Upon completing validation, the label will change to Validated and the button will be disabled.
Additionally a green check icon or red error icon will appear noting if the form was validated successfully or not.
72. Click here.
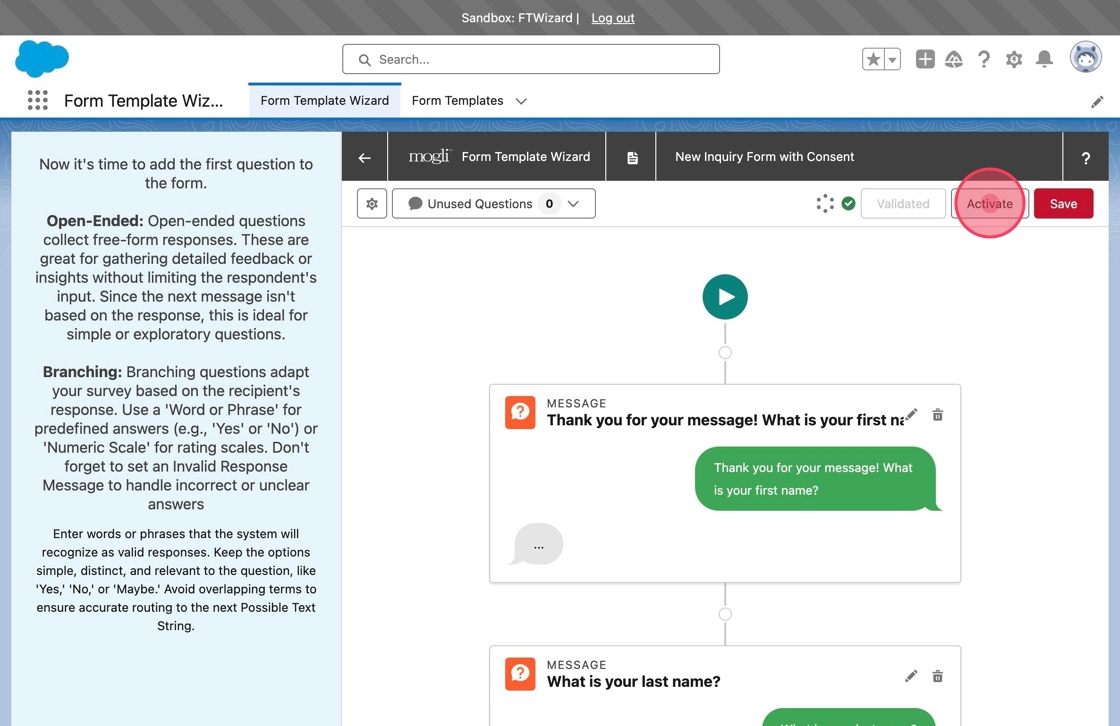
73. Because the form was validated and no errors were identified, the Activate button is enabled.
Click Activate to activate the form.
74. Upon activation, Activate will update to Deactivate.

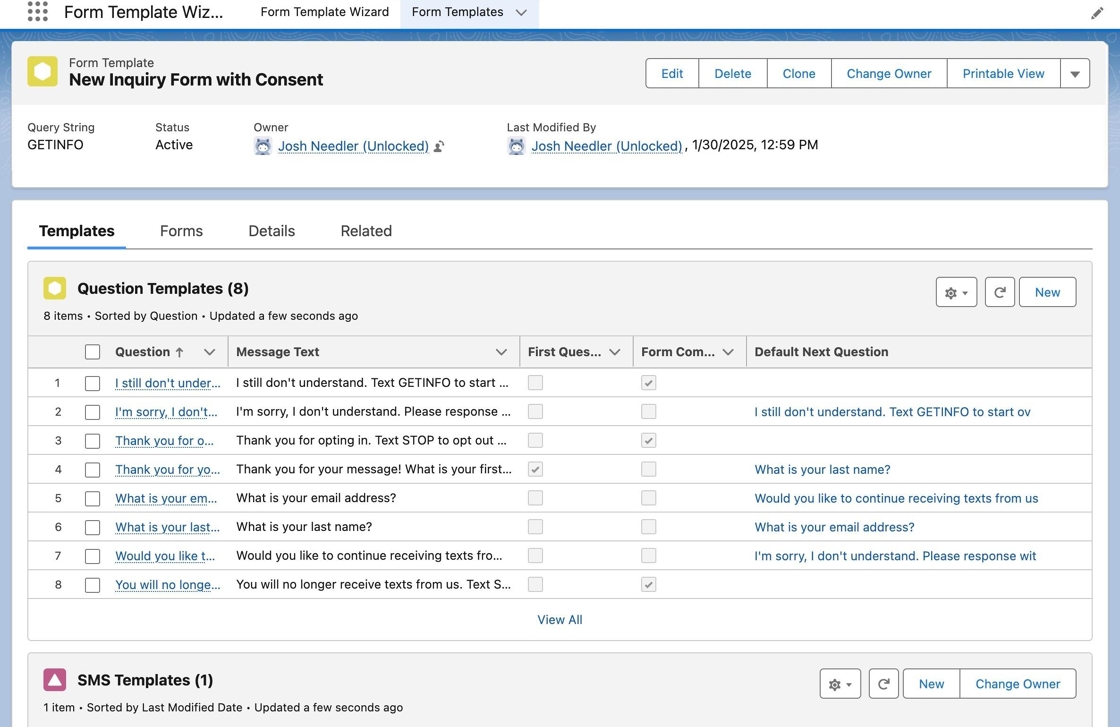
75. The form is now saved and activated in Salesforce.
Navigate to Form Templates and find and open New Inquiry Form with Consent. Notice that the form has been created accordingly and includes the Question Templates and SMS Template.
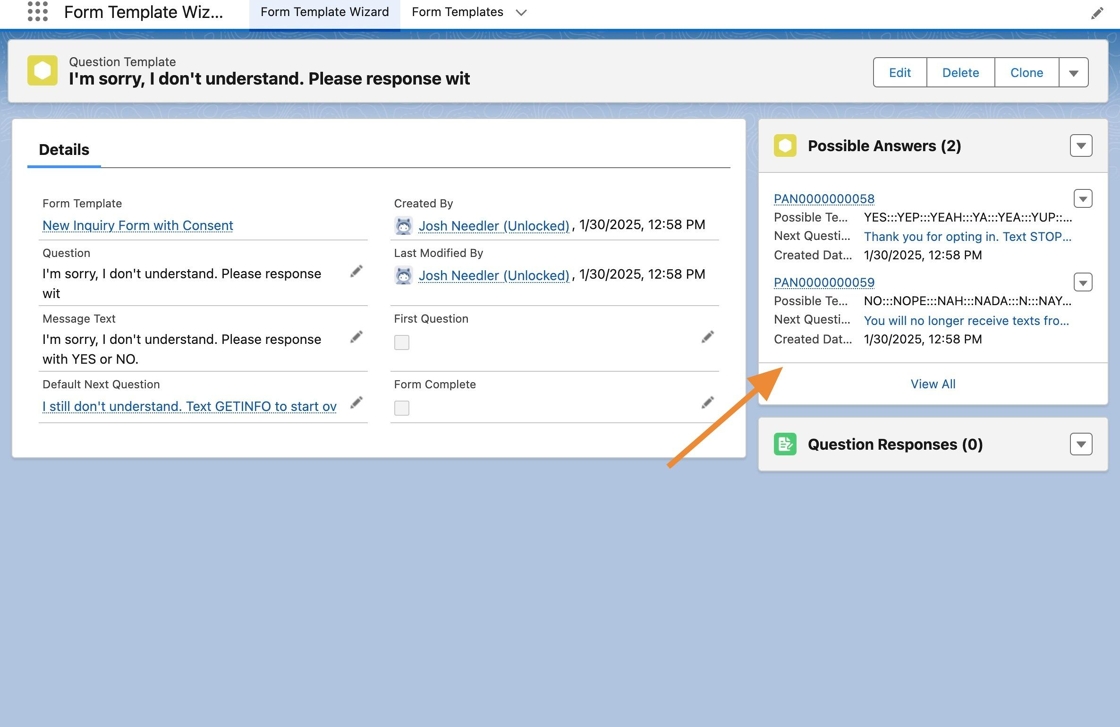
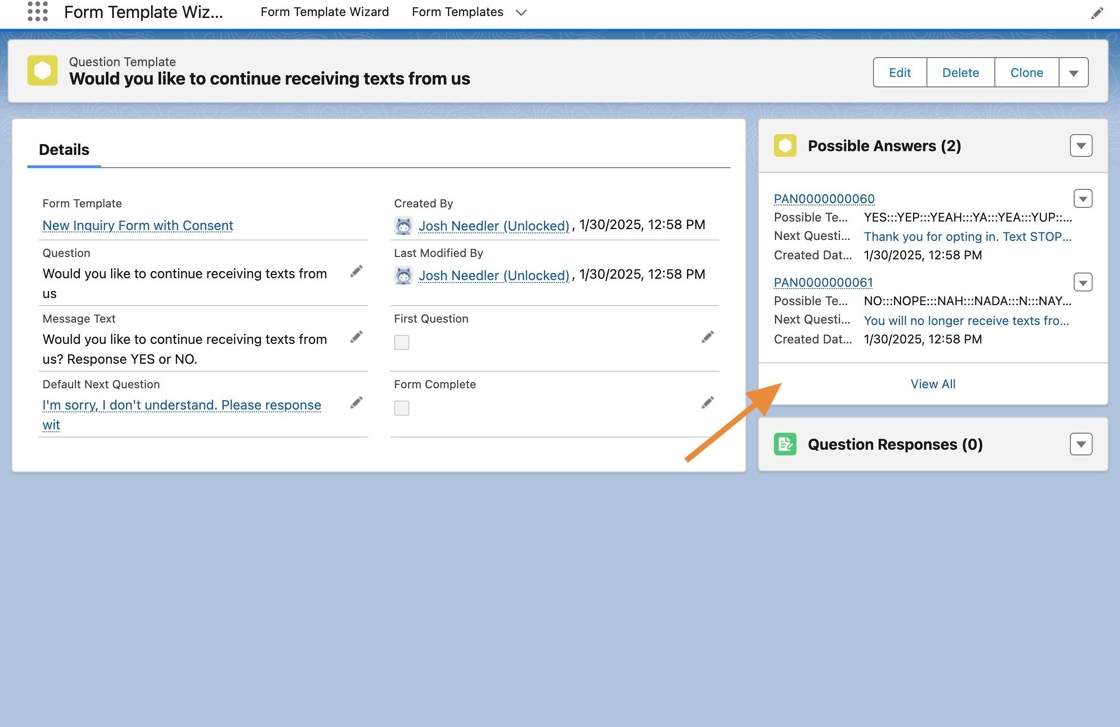
76. In the Question Template Related List, click Would you like to continue receiving texts from us*.*
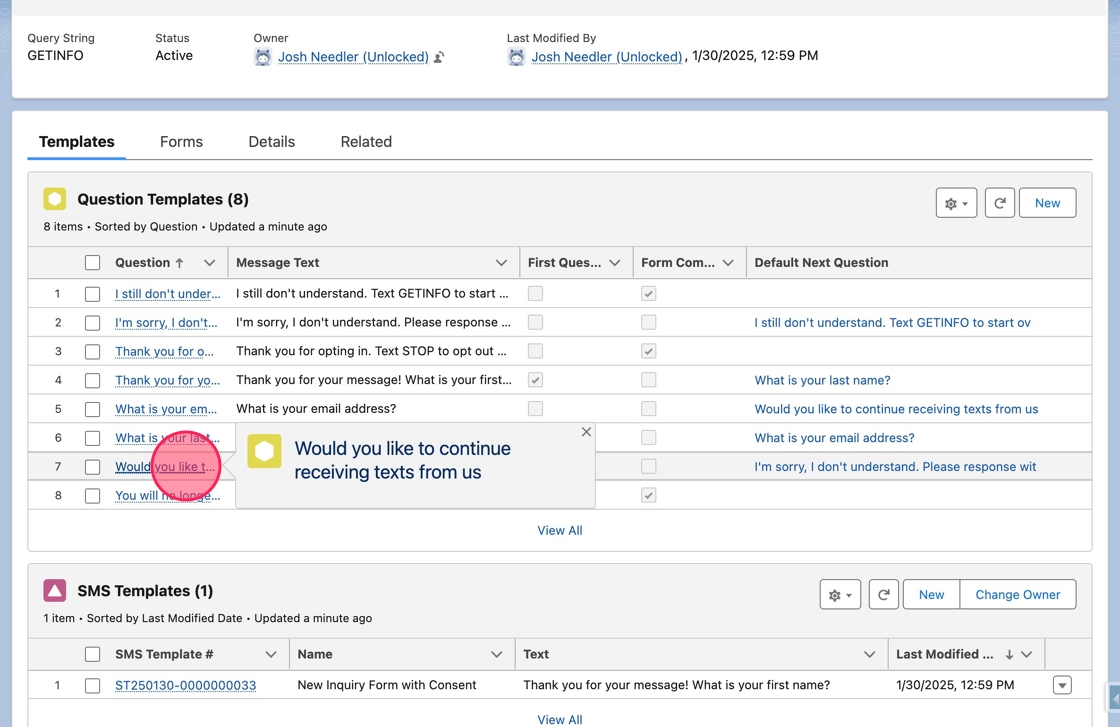
77. When the Question Template opens, notice that the Possible Answers were created, and the Possible Answer Text includes all the Accepted Responses concatenated with the proper delimiter.
78. Click on the Default Next Question to open it.
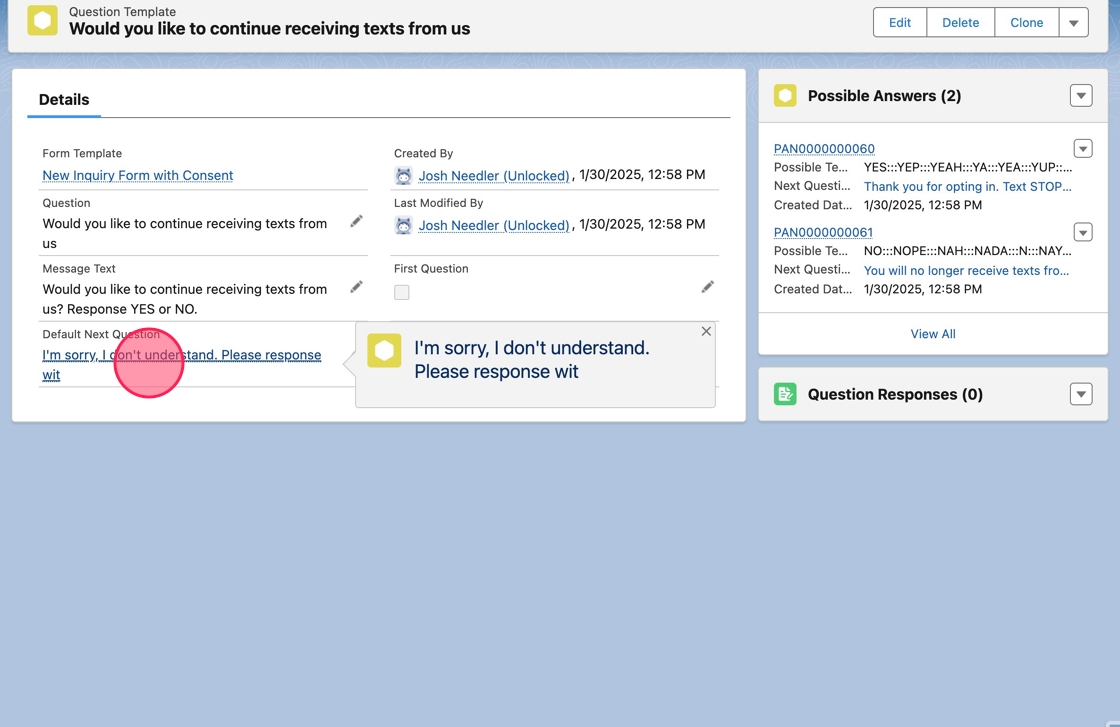
79. Notice it has the same Possible Answers.