Real-Time, Blinking, Chiming, In-App Notifications for Lightning Experience
Select Your Notification Settings
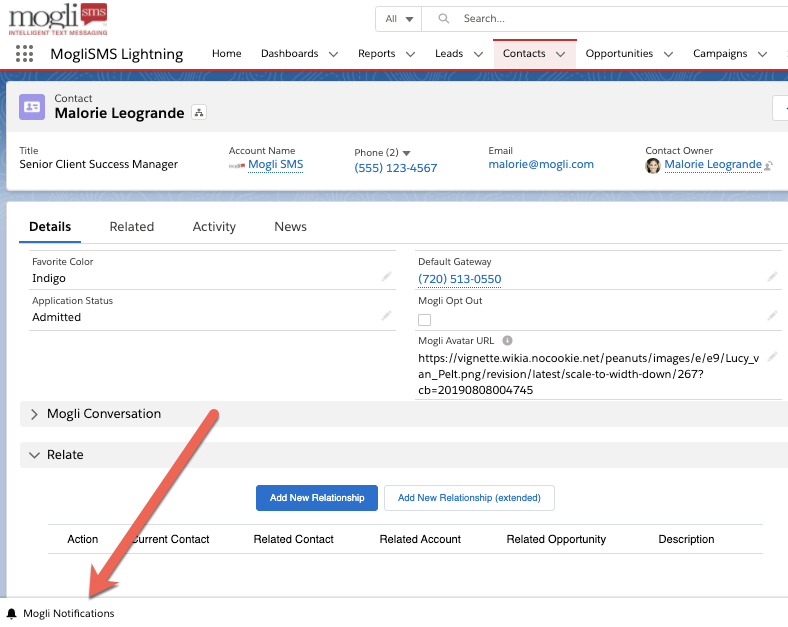
Click the Mogli Notifications component in the Utility Bar and select Settings.
Click the arrows in the Allow Notifications For dropdown menu and select your preference.
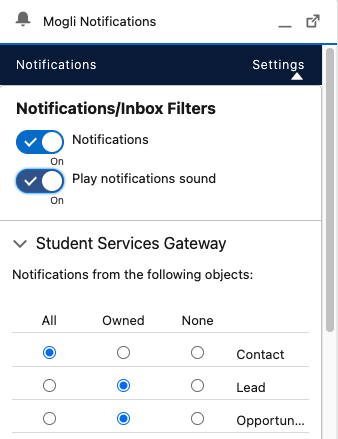
Select which Gateways you’d like to receive notifications for.
Select which records you’d like to receive notifications for.
Check or uncheck the Play Notification Sound checkbox and click Update.
You’ll now receive notifications according to your selected preferences.
Receiving and Retrieving Notifications
You could be doing something else inside of Salesforce when someone sends in a message.
When this happens, Mogli Notifications in the Utility Bar will blink and you’ll hear an audible chime (if selected in your settings).
Click Mogli Notifications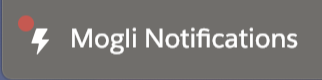 to see the message:

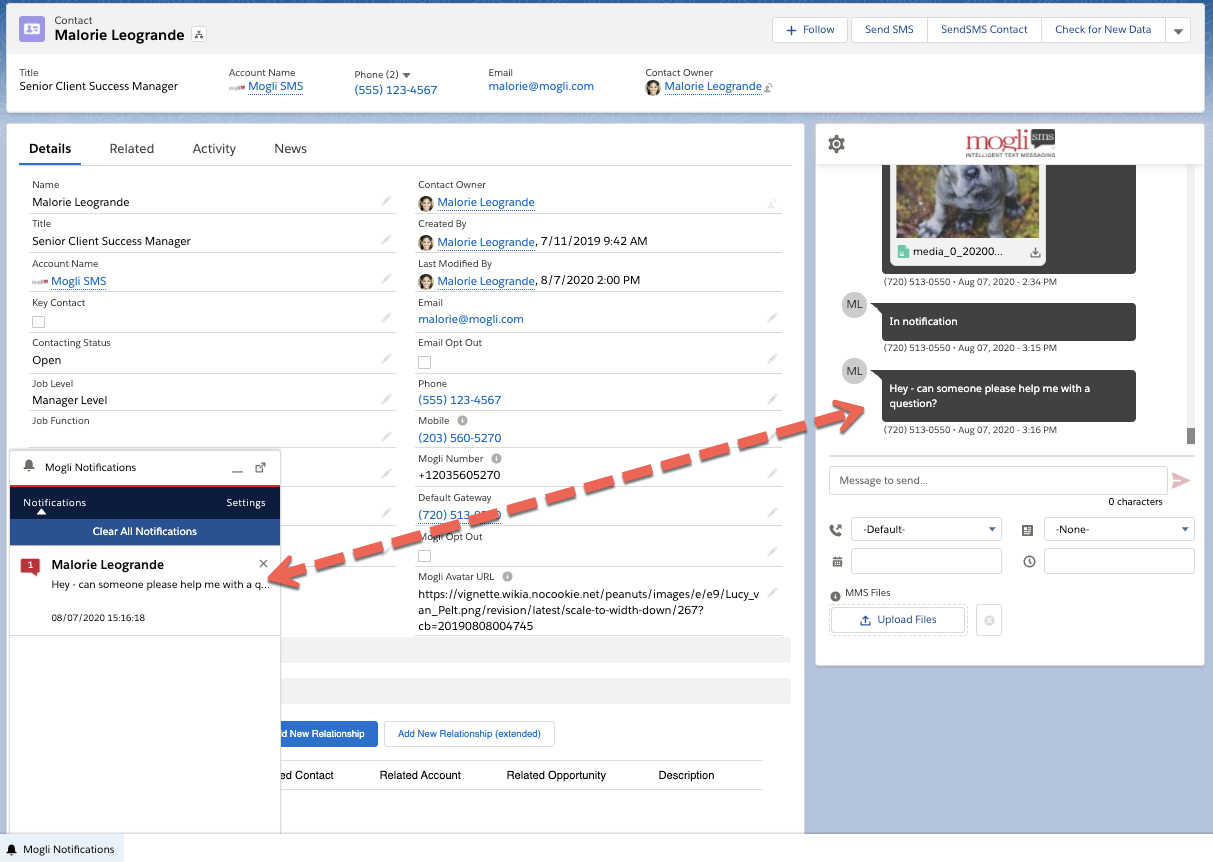
By clicking directly on the notification, you’ll be taken right to the associated record where you can view the entire message and continue the conversation:
If a notification is linked to an object besides Contact or Lead, clicking on the notification will take you directly to that record.
Use the Clear All Notifications button to acknowledge them in bulk.
Mogli Notifications in Other Apps
You can add the Mogli Notifications Component to any of your unmanaged Lightning apps.
From Setup, enter App Manager
Find the Lightning app of your choice (ensure that it’s an unmanaged package)
Click the caret on the right and select Edit
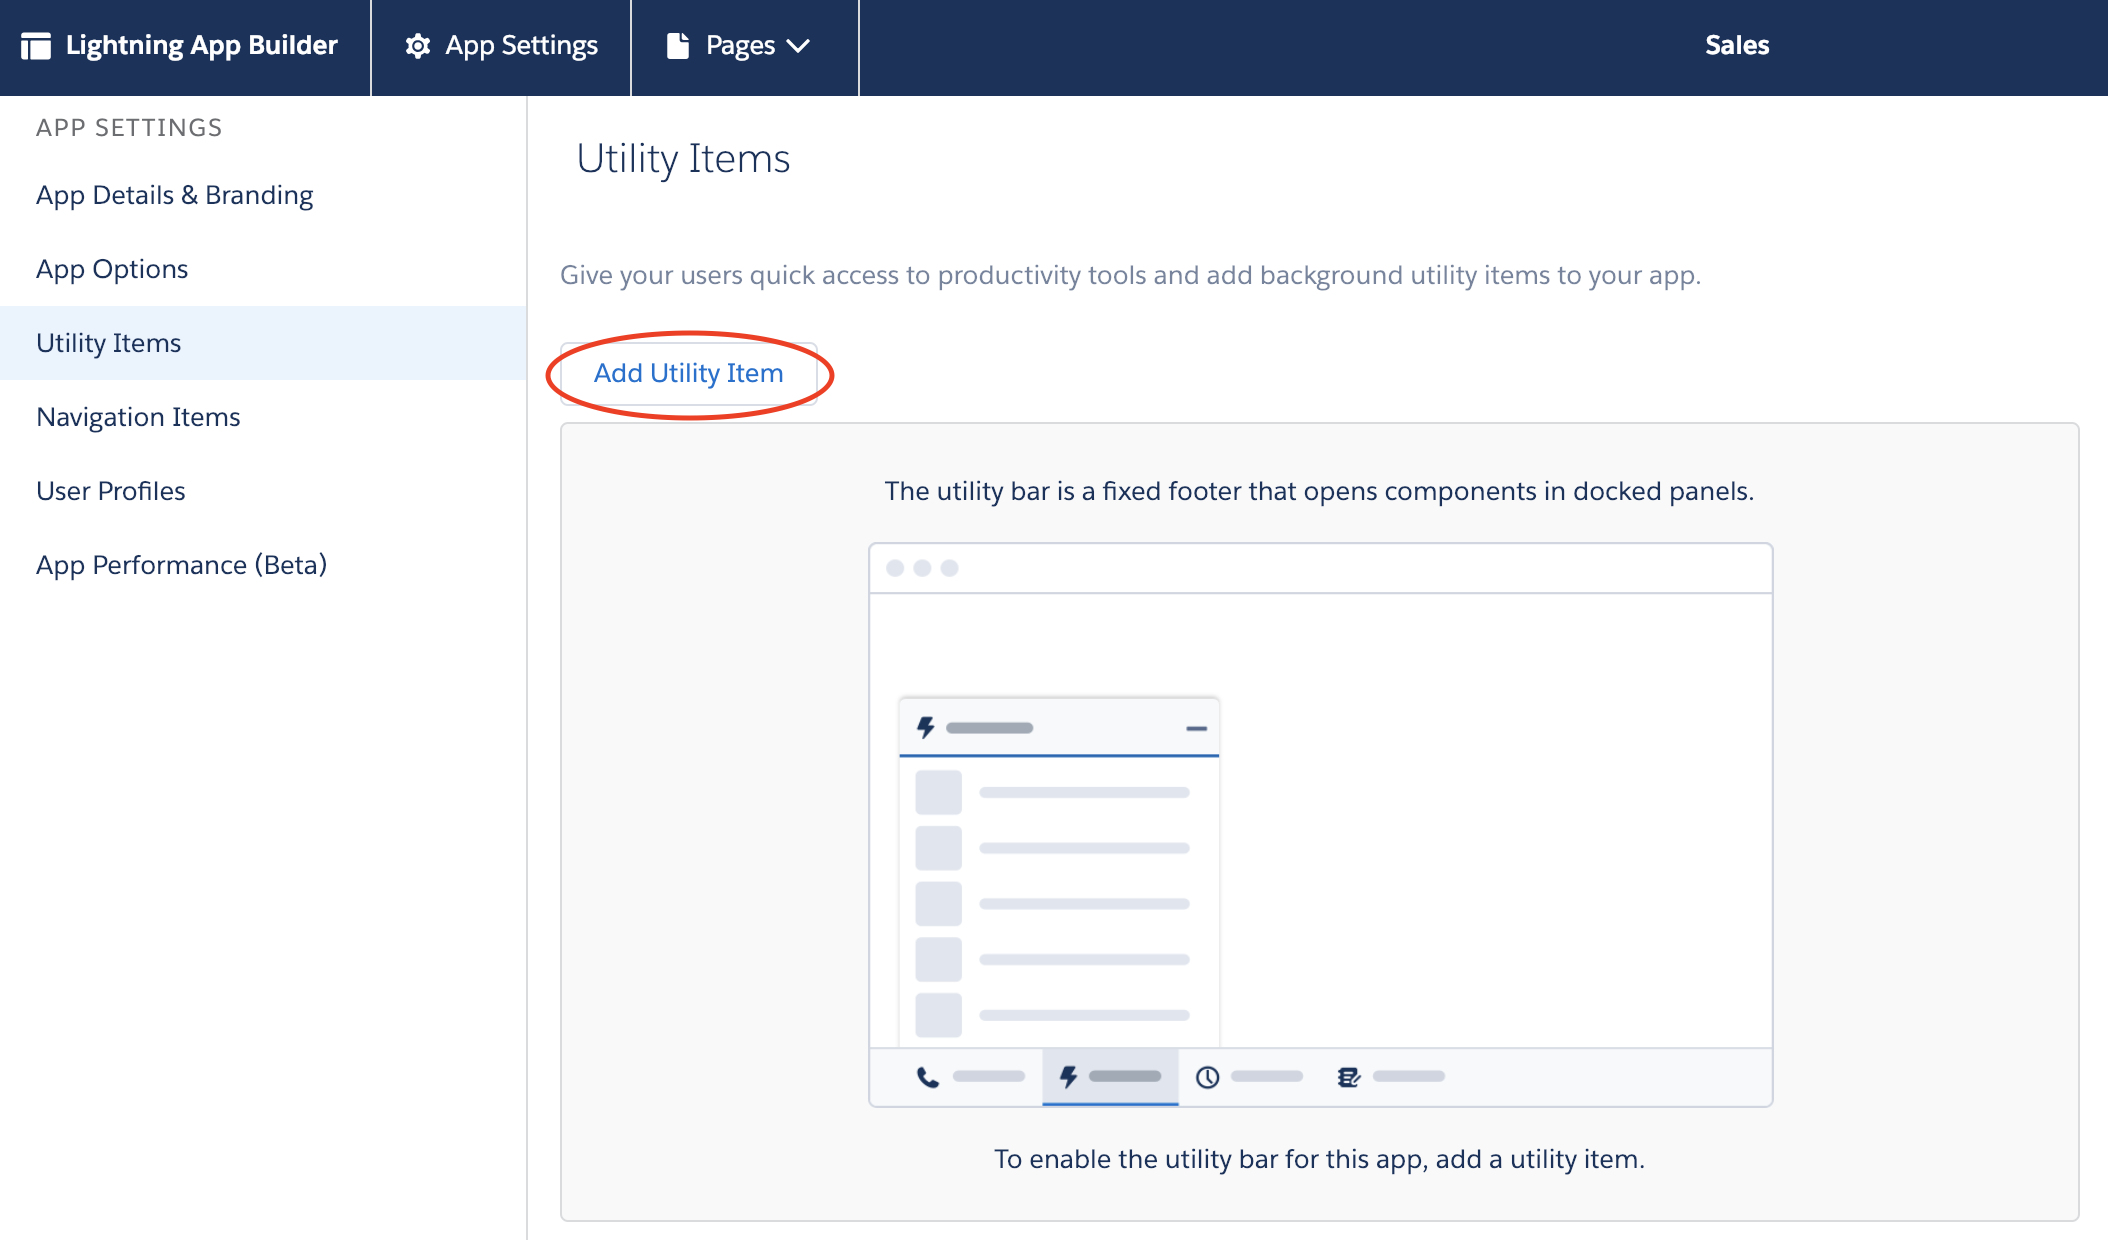
Select Utility Items, then Add Utility Item -
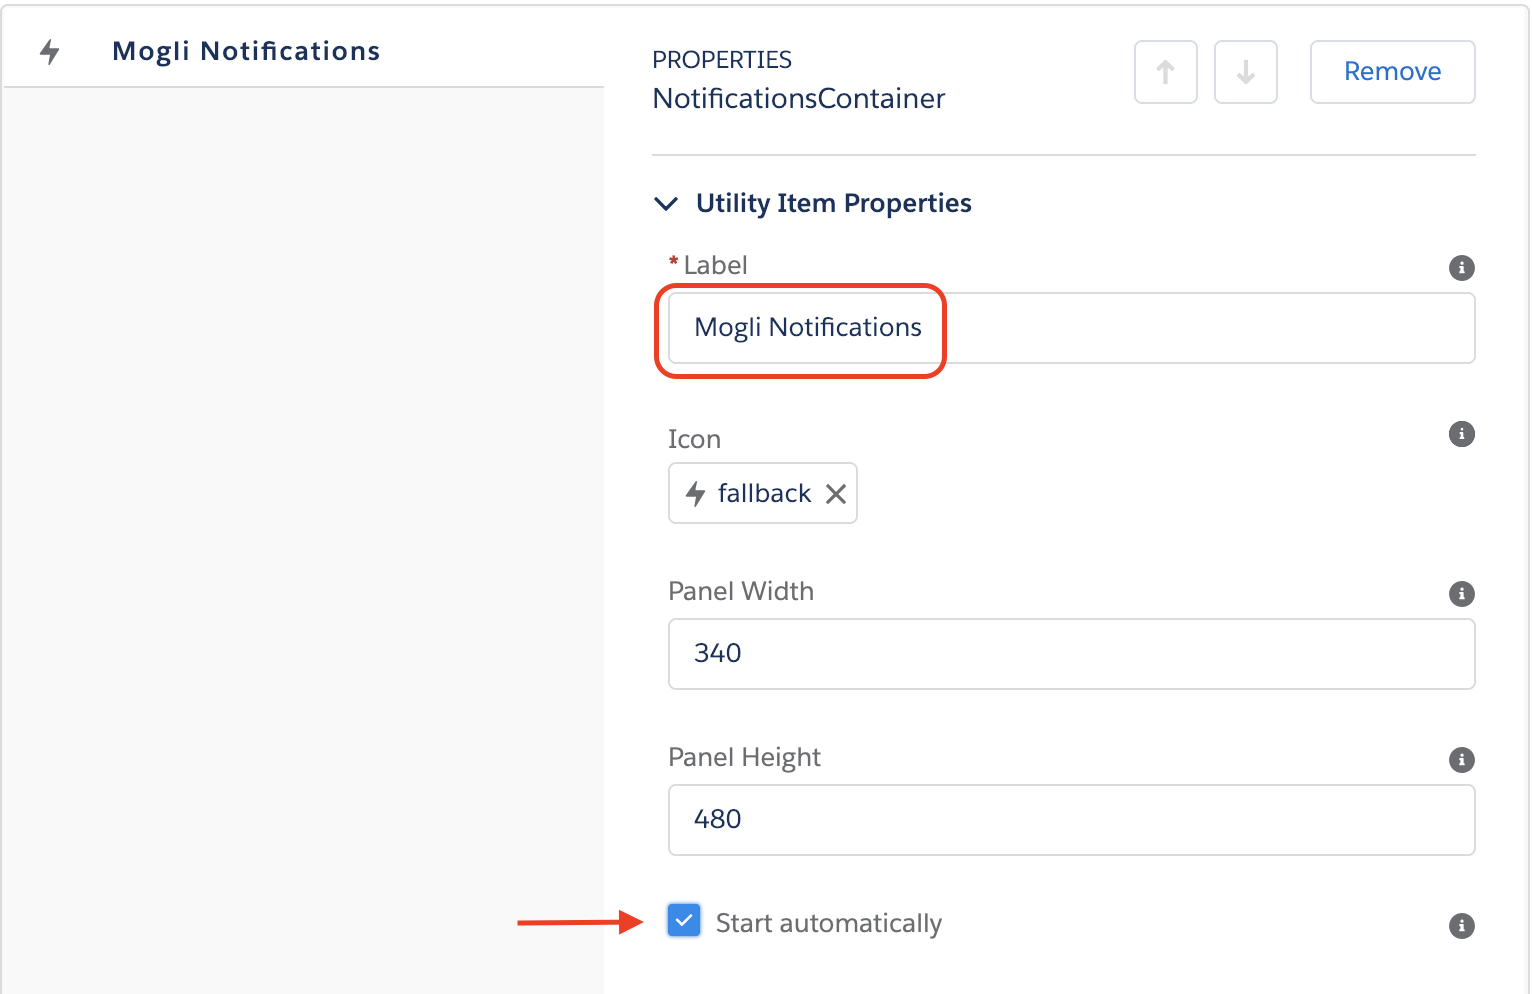
Scroll down and find Mogli Notification Utility in the Custom Properties.
Change the Label to Mogli Notifications, and check the Start automatically checkbox. Click Save.
Navigate to the Lightning-based app. You should now see the Mogli Notifications Component in your Utility Bar
ADMIN TIP: If a user isn’t receiving notifications, add Read access to Push Topics on their Profile.
Where can I see the Notification Settings for all users?
Navigate to the Mogli SMS Lightning App, then click the Notification Settings tab. Adjust the fields that display to view the notification settings record owner. Navigate to a record to review the notification settings each user has selected. The related tab will display Notification Gateway Preference records which indicate which gateways have been selected.
If a user has selected a notification setting (such as ‘Any Incoming SMS’), but has not checked the ‘Select All Gateways’ checkbox, and does not have any Notification Gateway Preferences selected, they will not receive notifications. Users must choose at least one gateway option. Additionally, users must have Read/Create/Edit access to the Push Topics object. This can be added to a permission set or granted at the profile level.
Custom Notifications
Mogli Notifications are designed to keep you informed about inbound messages, ensuring timely responses and collaboration. While standard notifications are available to all users, custom notification methods are a powerful feature of the Notifications+ booster pack, designed for clients who need more flexible and targeted alerts.
There are three custom notification methods:
Push Alerts and Salesforce Mobile App Push Notifications: These provide immediate, pop-up notifications directly on your desktop or mobile device when an inbound message is received, ideal for real-time awareness.
Email Notifications: If a user has an email address populated on their Salesforce User record, they can receive an email alert for inbound responses, offering a convenient way to stay informed without being actively in Salesforce.
Mobile Notifications: Similar to email, if a user has a mobile number on their User record, they can receive SMS notifications for inbound messages, providing another direct and immediate channel.
It's important to choose one of the two custom notification types to define who gets notified:
Record Owner: This type notifies the Salesforce User designated as the "owner" of the record associated with the inbound message. However, be aware that the record owner isn't always the person who needs to be notified, especially if administrators or automated users are the technical owners.
Last Outgoing Sender: This is often the preferred option as it notifies the last user who sent an outgoing text message to that record. This ensures the most relevant person, who is actively engaging with the client, receives the inbound response.
Configuring Custom Notifications
Activating Custom Notifications (Notifications+ booster)
If you'd like to enable this feature, please reach out to your Account Manager to discuss your specific use case. They can help you determine the best approach for your team and assist with enabling the Notifications+ booster pack.
1 | Ensure Notification Delivery Settings are enabled
|
|
2 | Enable Additional Notification Types (Admins) Navigate to Setup>Process Automation>Flows Click the Flow titled “[Mogli] Custom Incoming Notifications” Click Activate | |
3 | Customize Additional Notification Types (Admins) Navigate to the Mogli Tab labeled “Application Settings”
Click Save |
.png)

Permission Sets
You need to ensure the Mogli SMS Custom Incoming Notifications Permission Set is assigned to users who need to receive Custom Notifications